

Guides / Layers
Layers
Add, switch, reorder, hide, lock, rename, duplicate, group and delete layers, from the layer strip or the Layers sheet.
Every painting starts with one layer. The strip on the right shows your layers, the top one first, with a thumbnail of each.
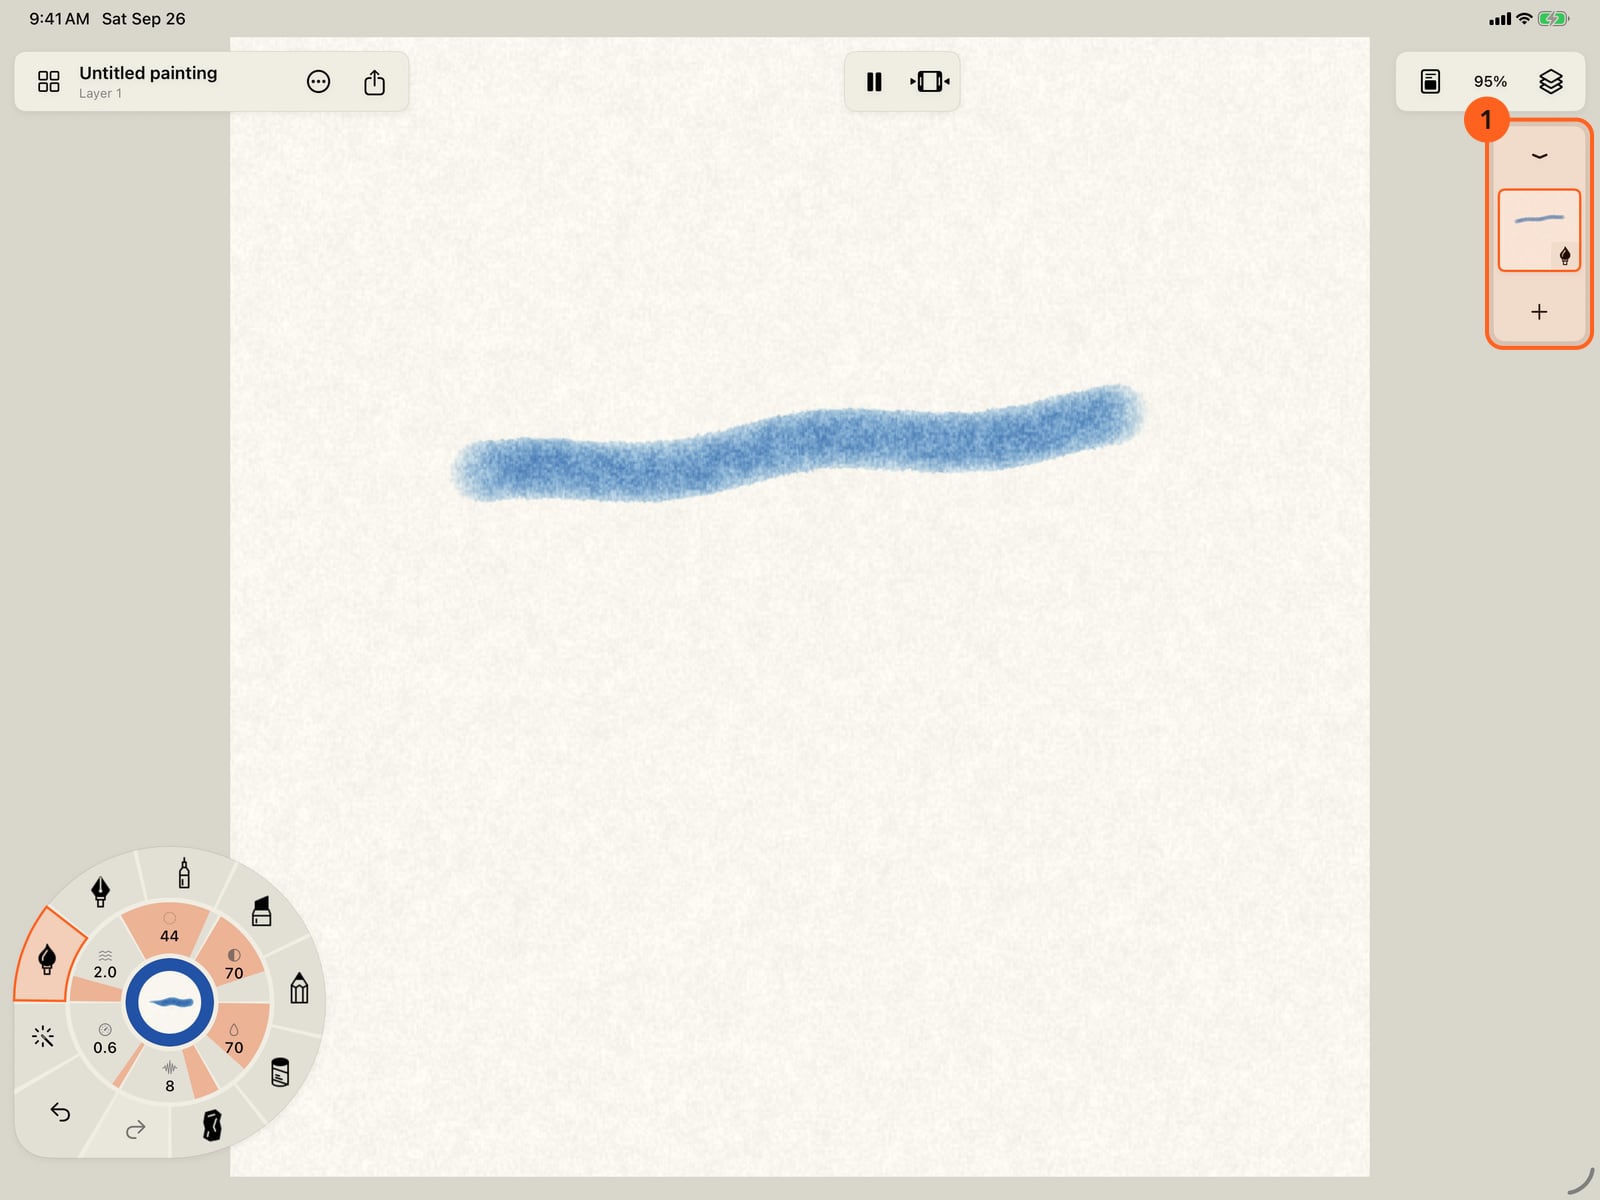
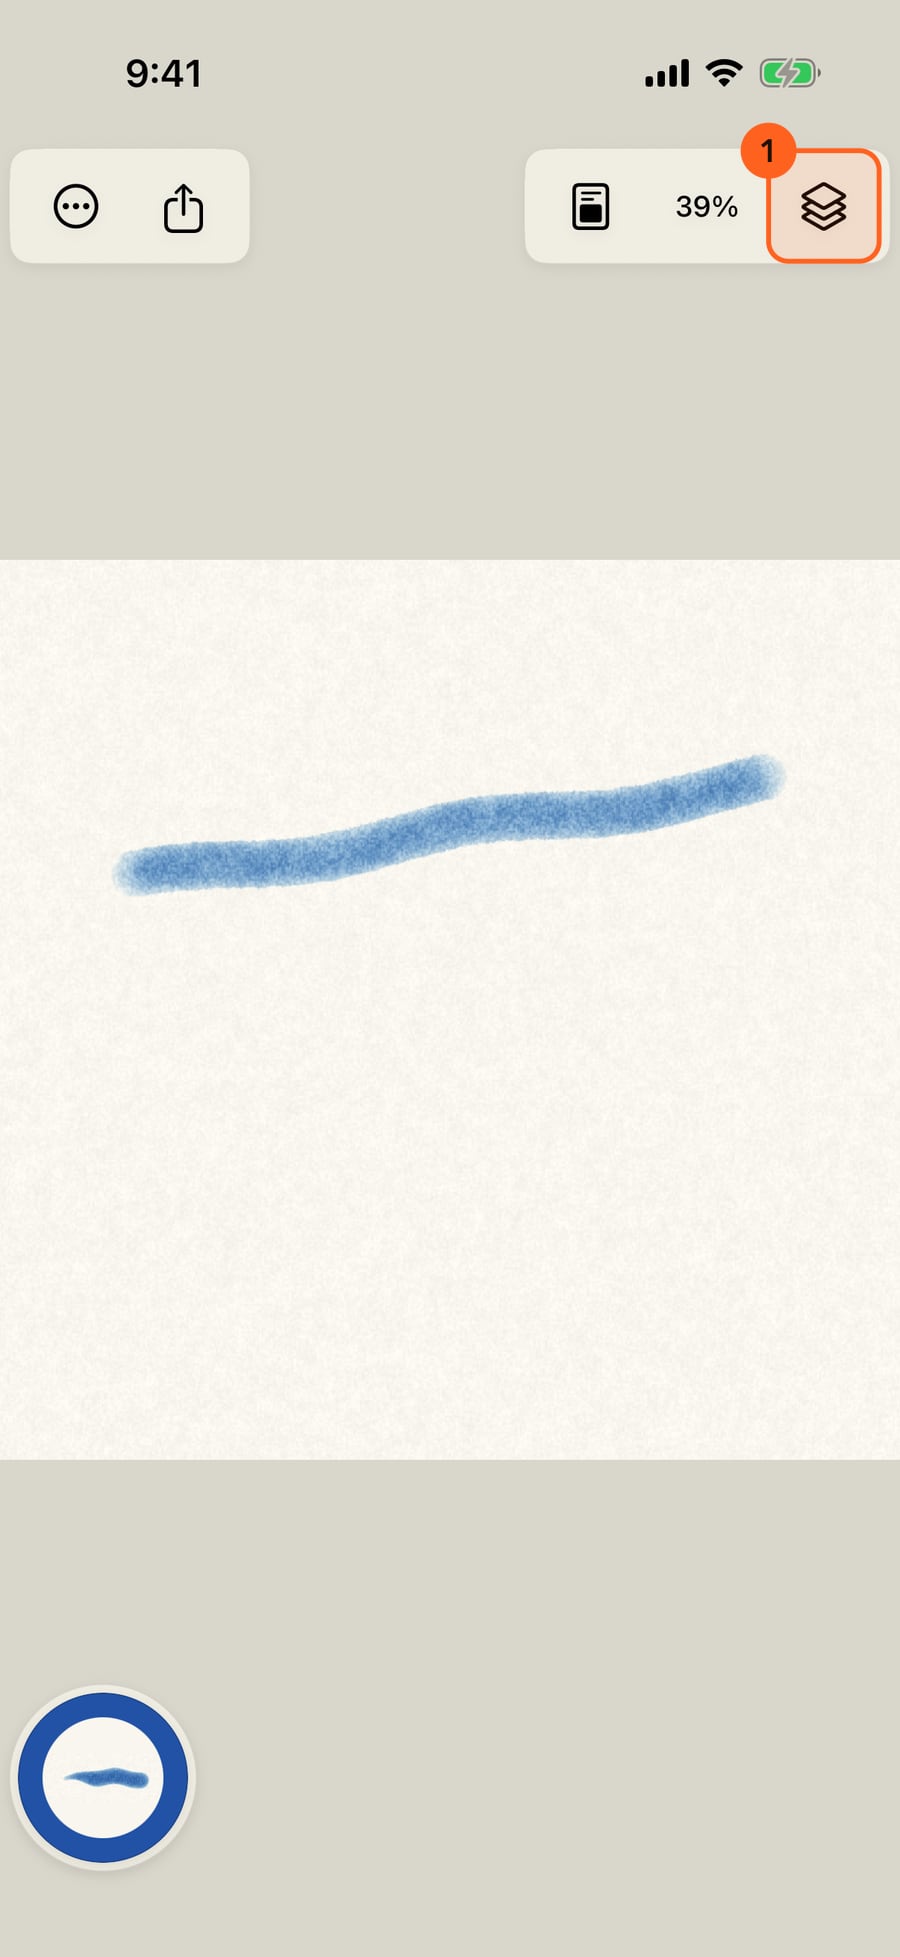
Every painting starts with one layer. On iPhone there is no room for the layer strip, so your layers are behind the Layers button.
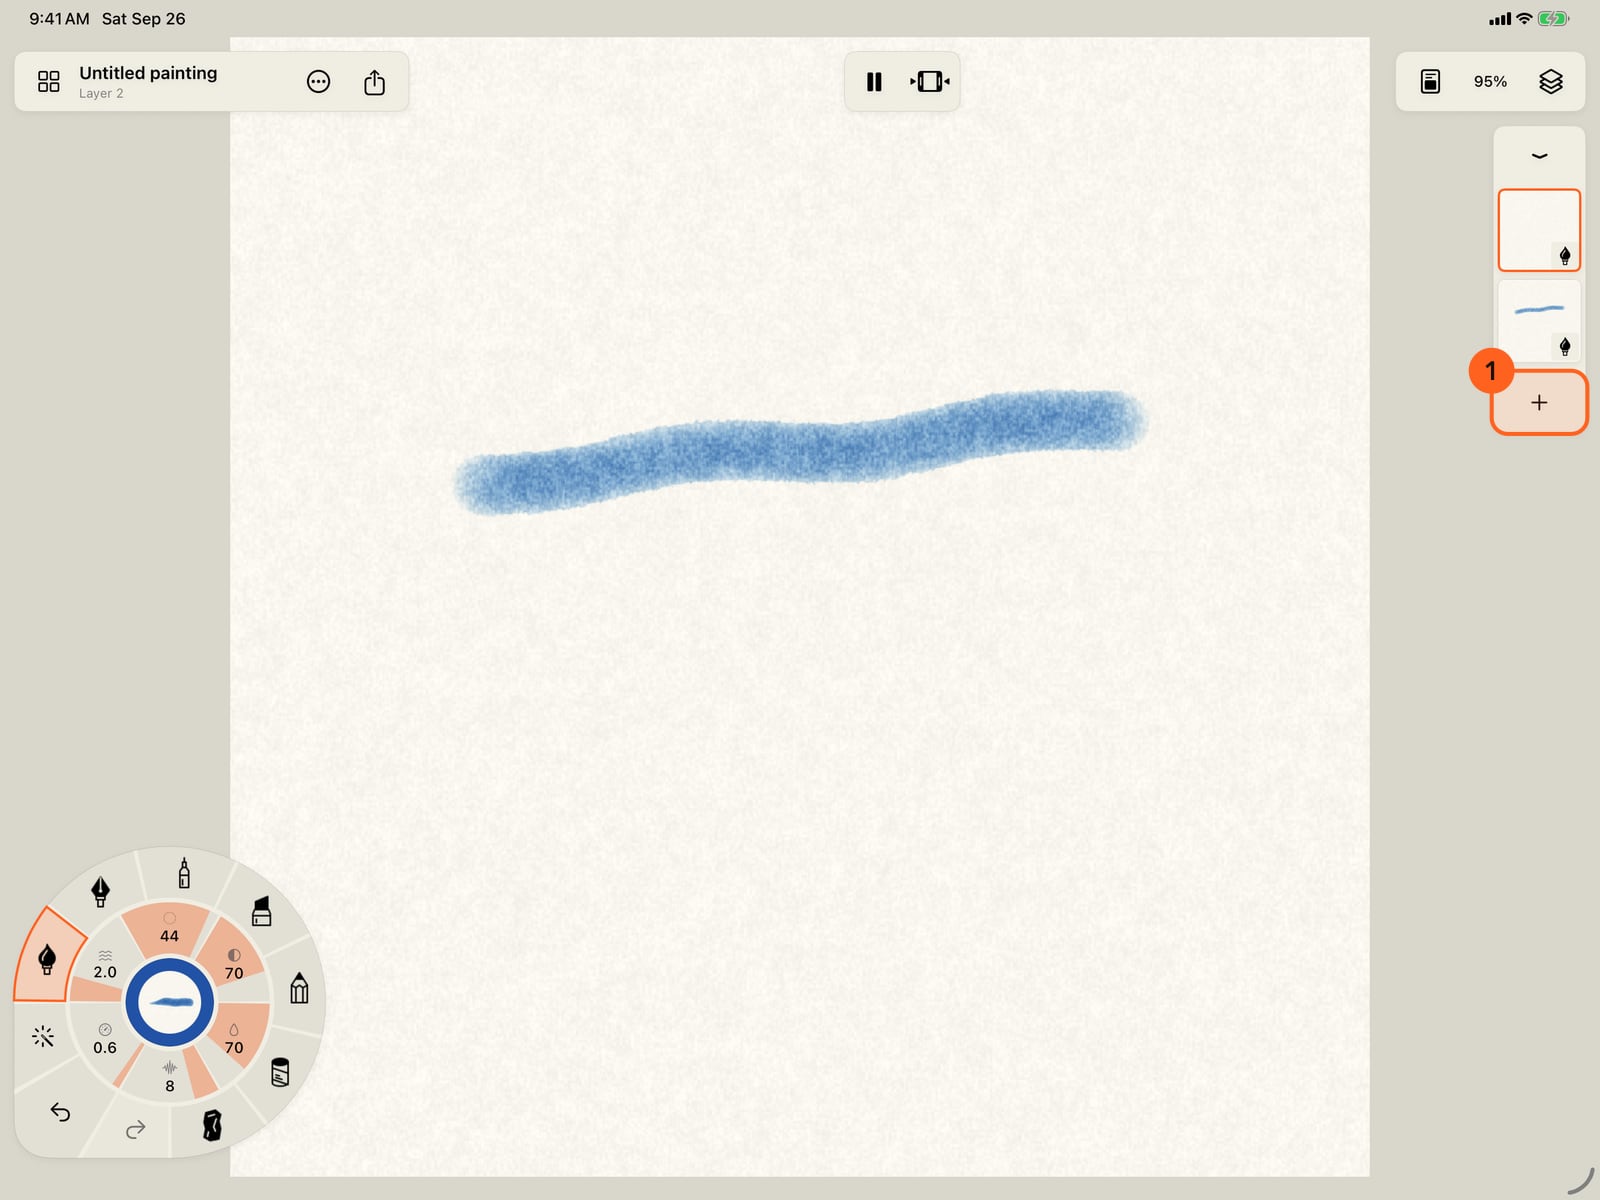
Tap the plus under the thumbnails to add a layer on top. It becomes the current layer, outlined in orange.
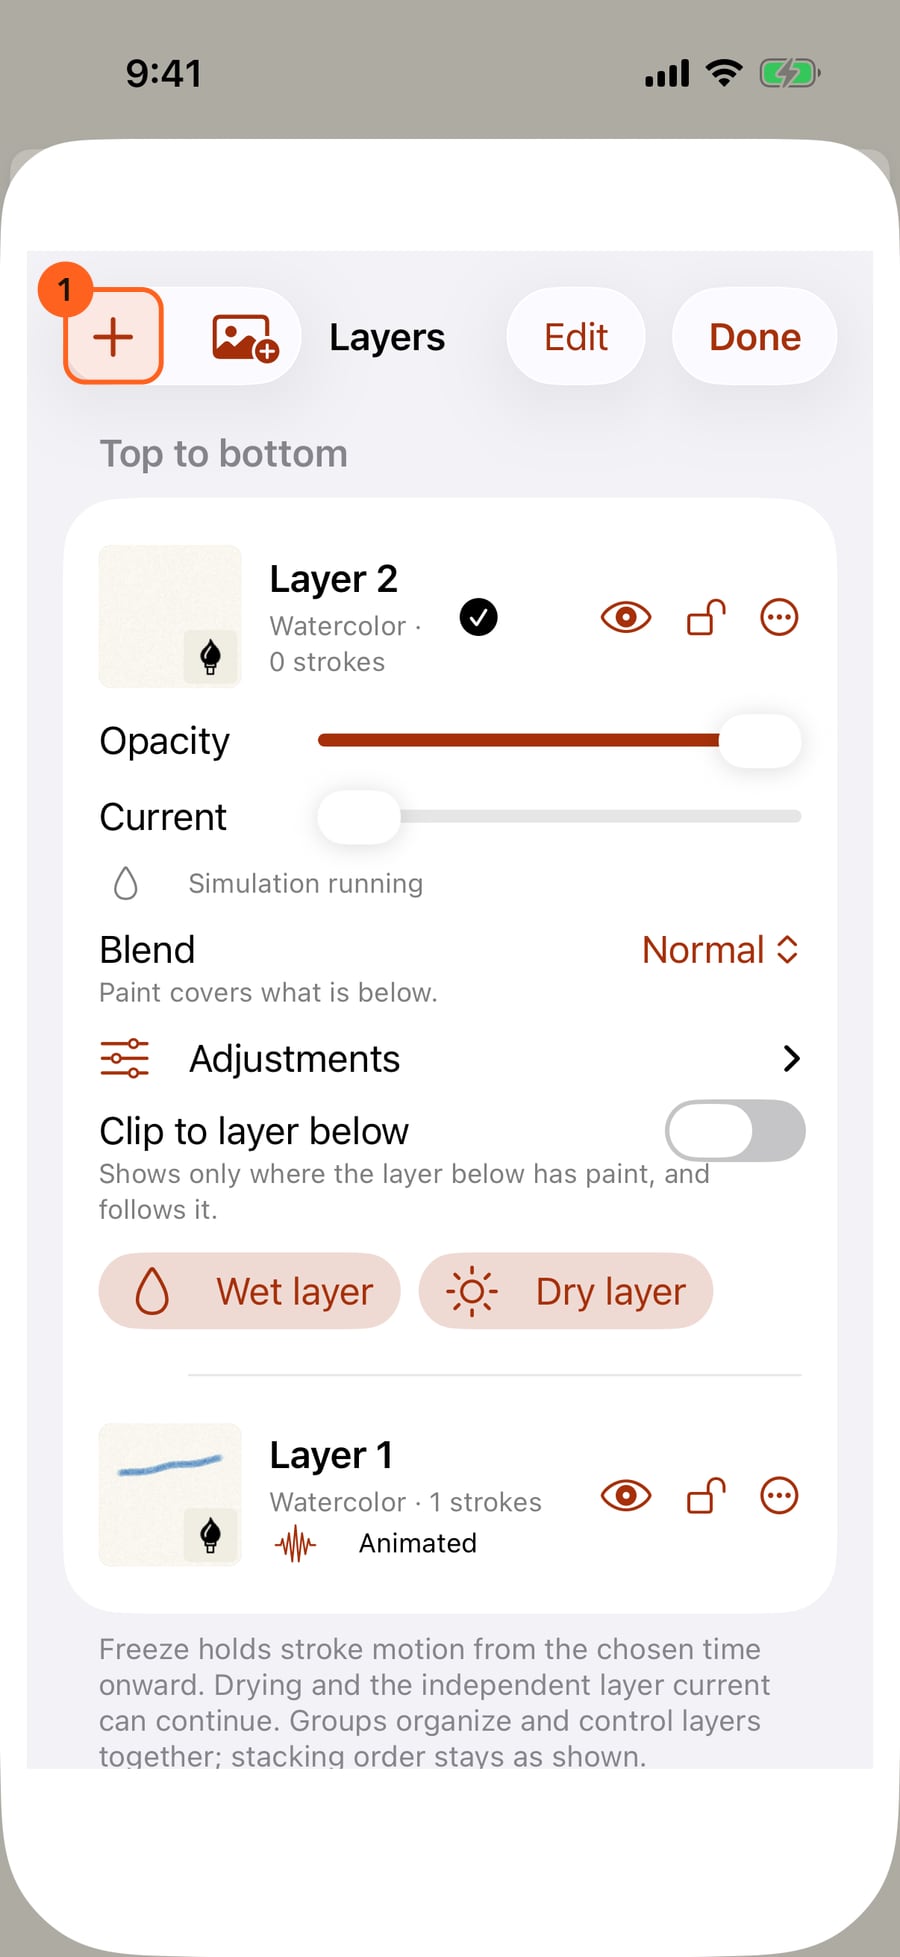
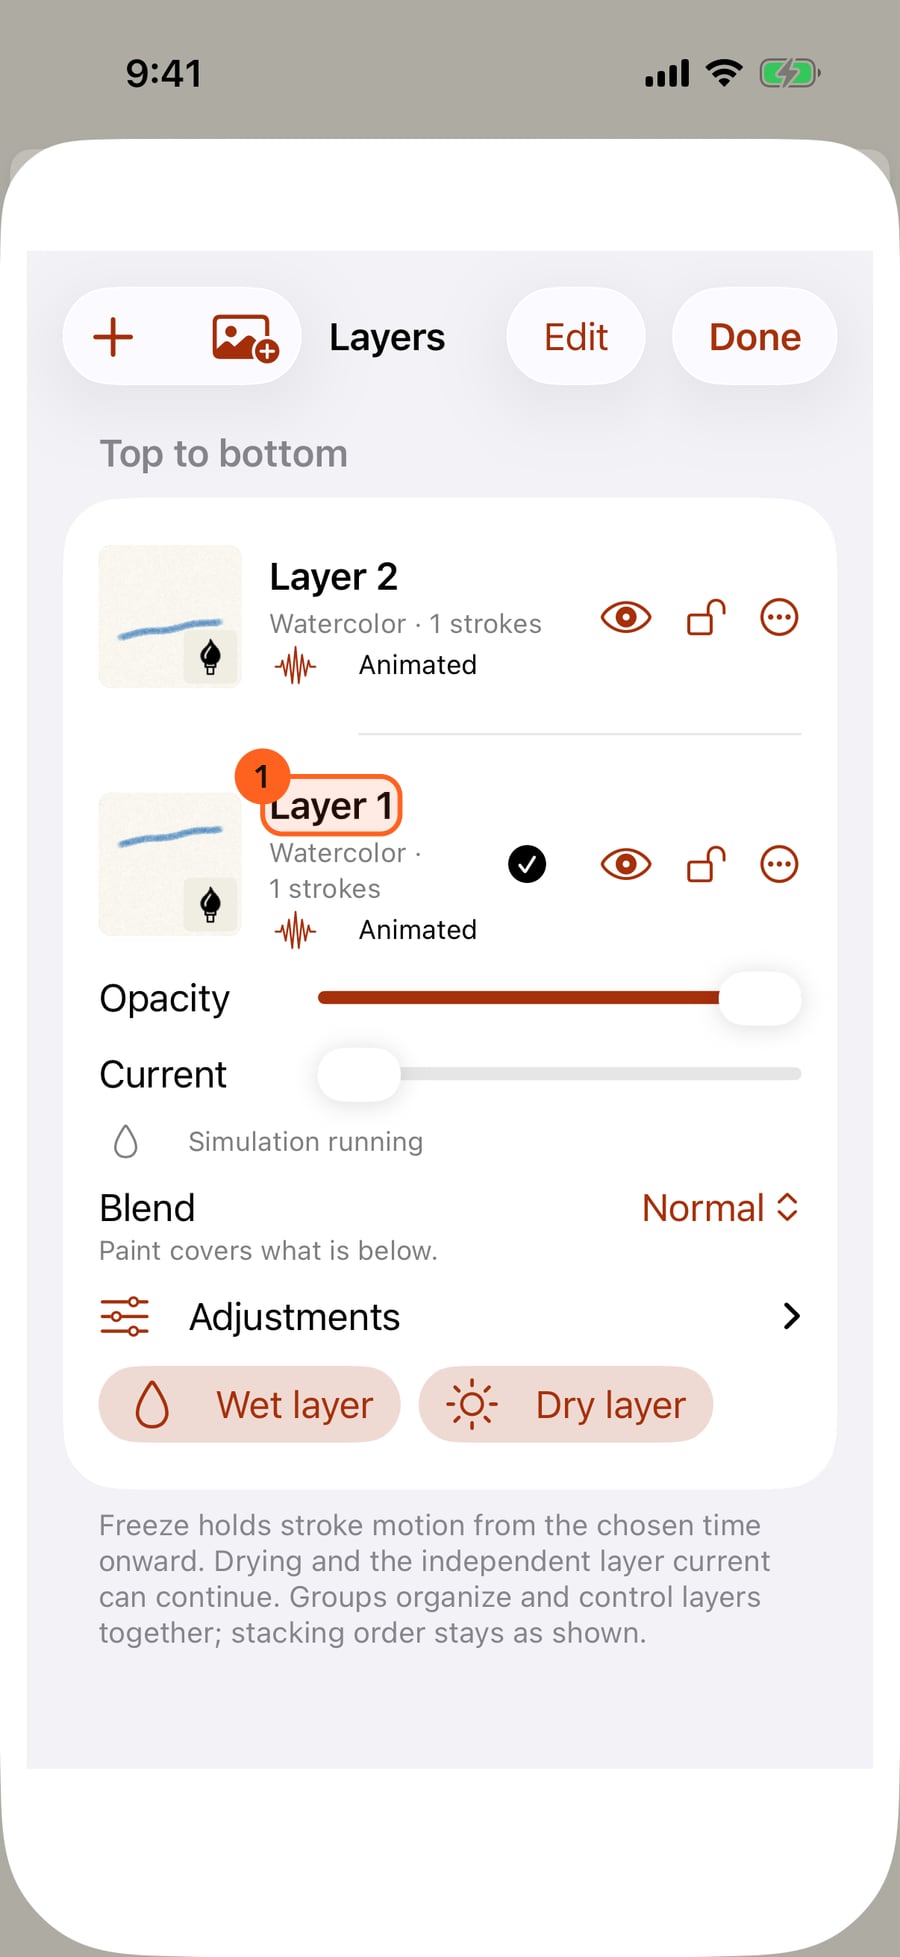
Tap Layers, then Add layer. The new layer goes on top and becomes the current layer, marked with a tick.
Click the plus under the thumbnails to add a layer on top. It becomes the current layer, outlined in orange.
Paint on the new layer, then tap another thumbnail to switch to that layer. Tap the current one again for its controls.
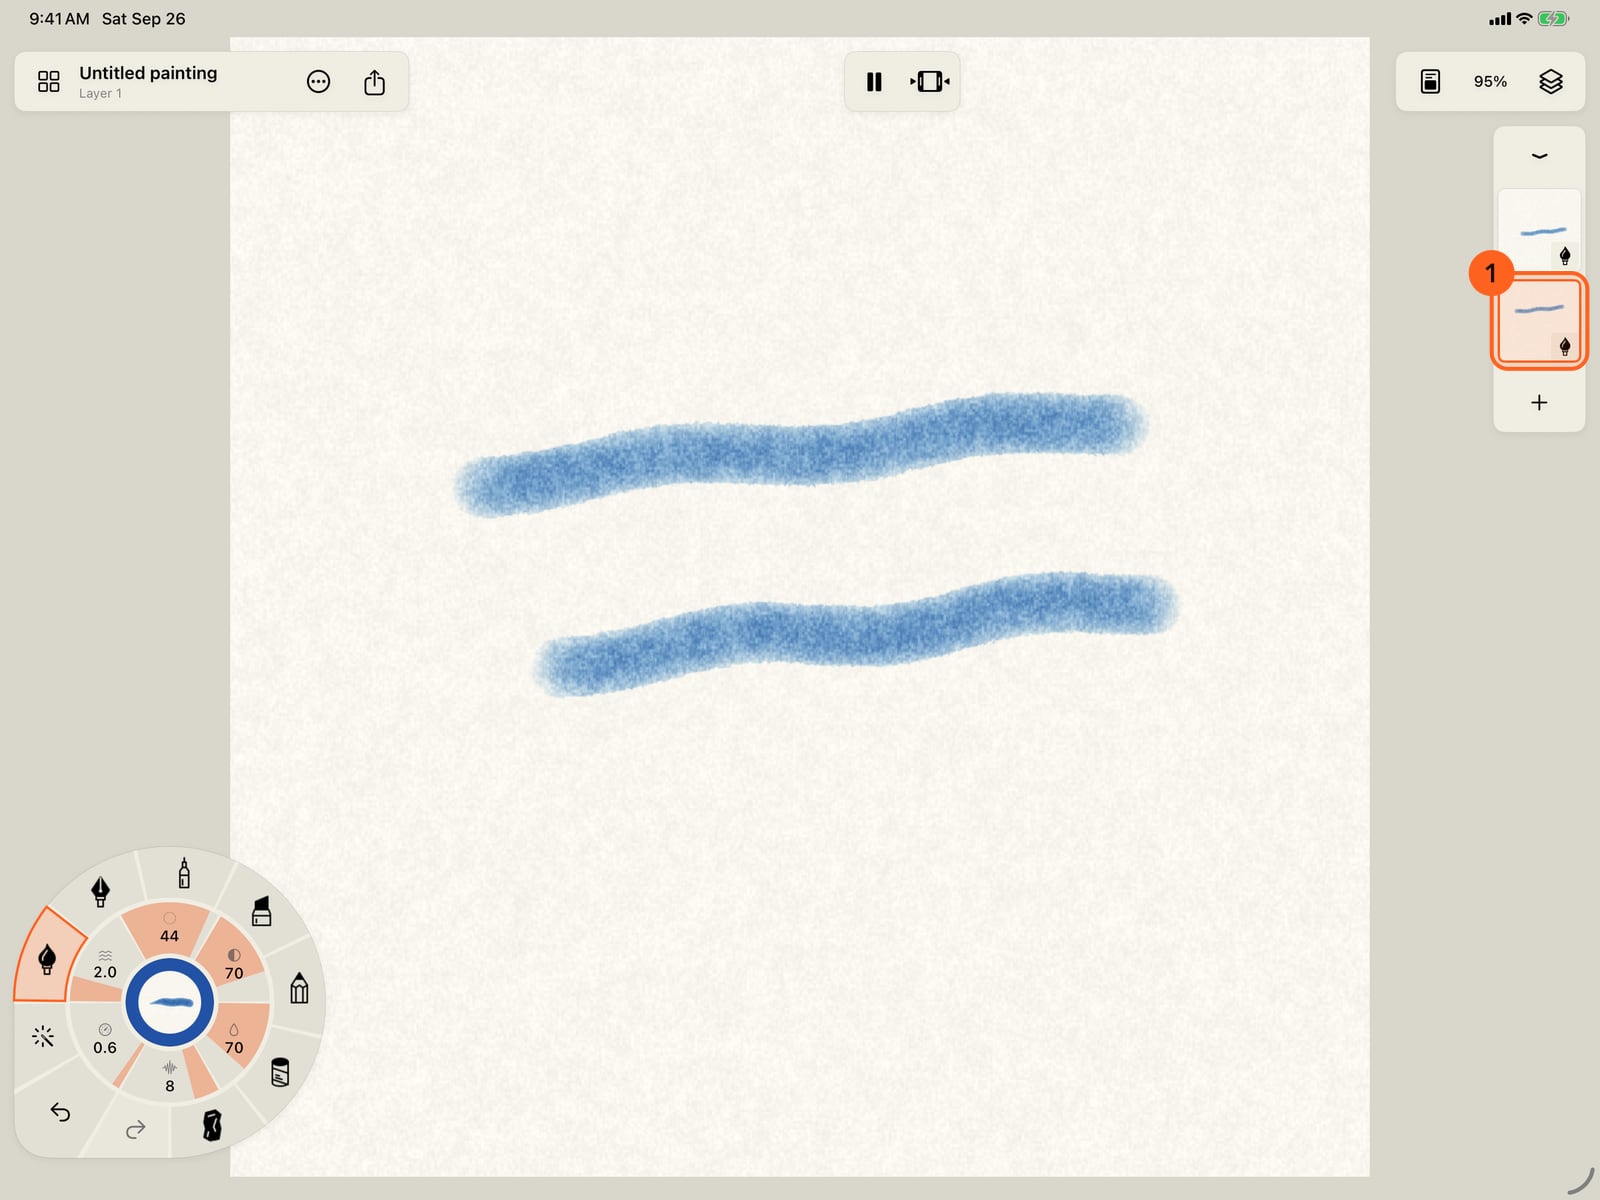
Tap Done, paint on the new layer, then open Layers again and tap a layer to switch to it. The current layer's controls open beneath it.
Paint on the new layer, then click another thumbnail to switch to that layer. Click the current one again for its controls.
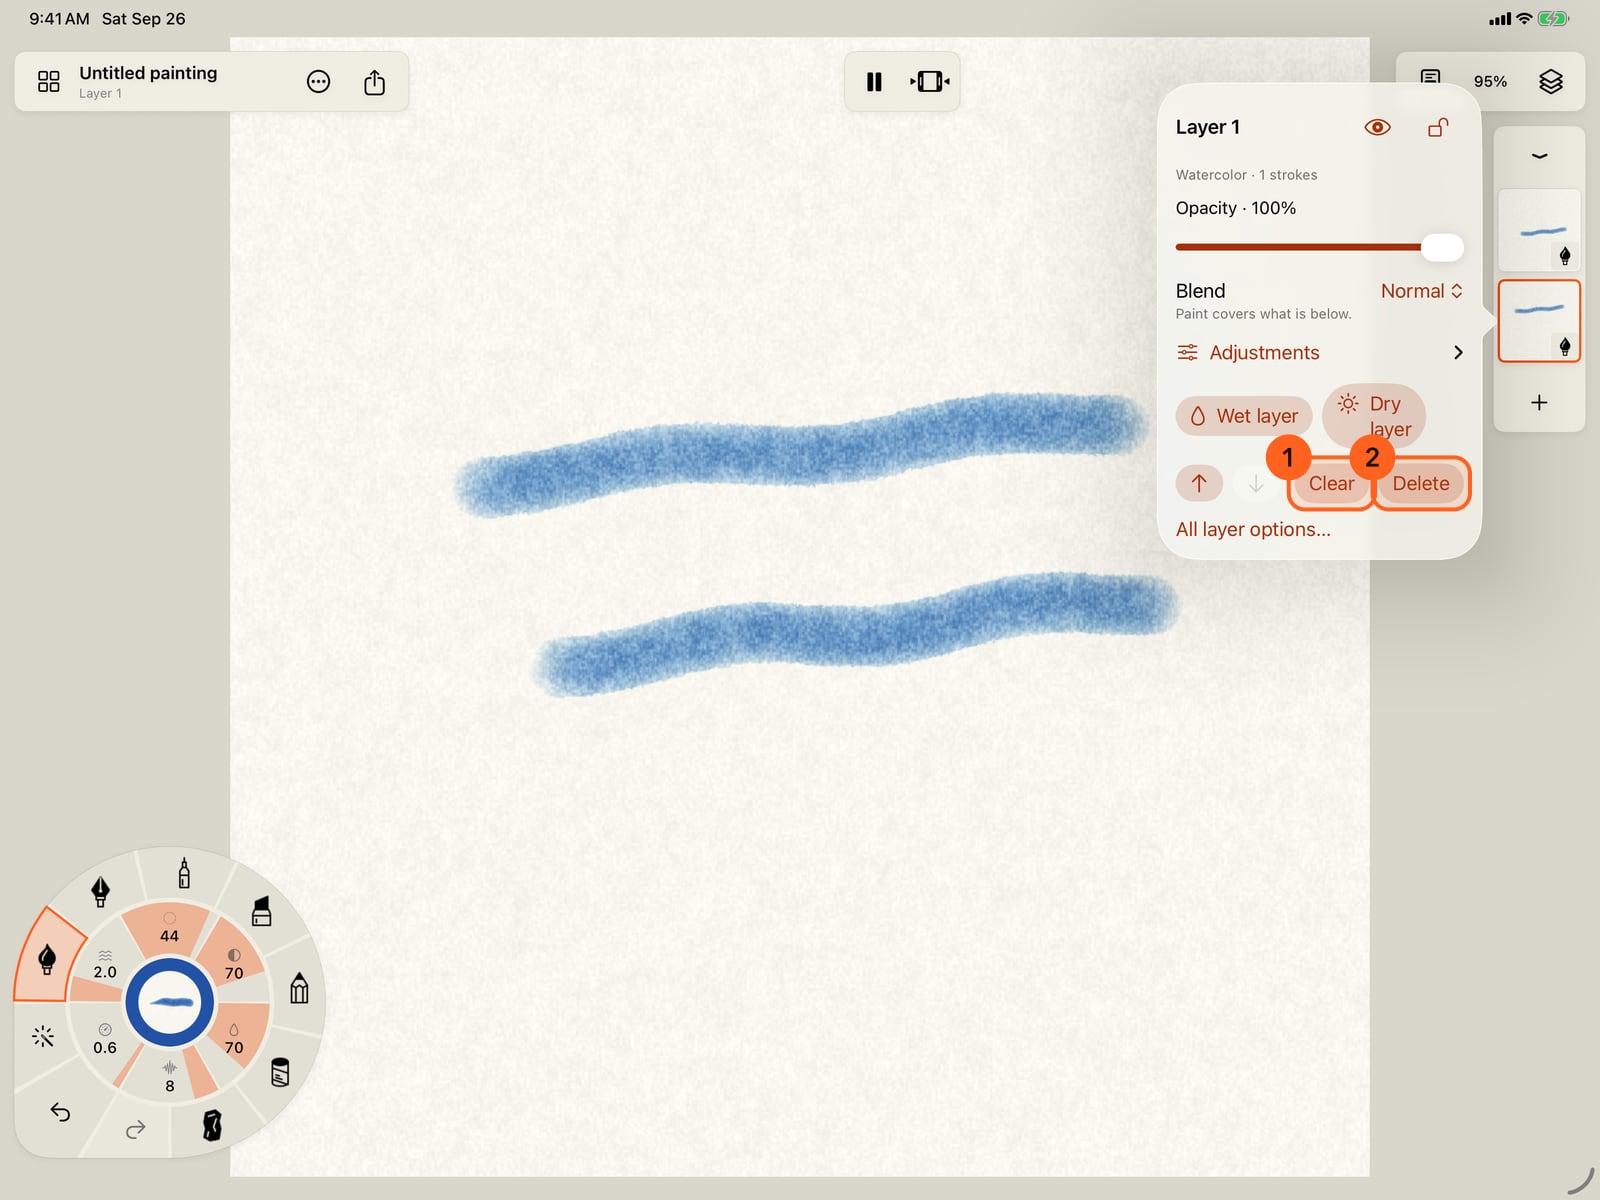
Tap the current layer again for its controls. Clear empties it in one go, and Delete removes it, without the eraser or the Layers sheet. Undo brings either back.
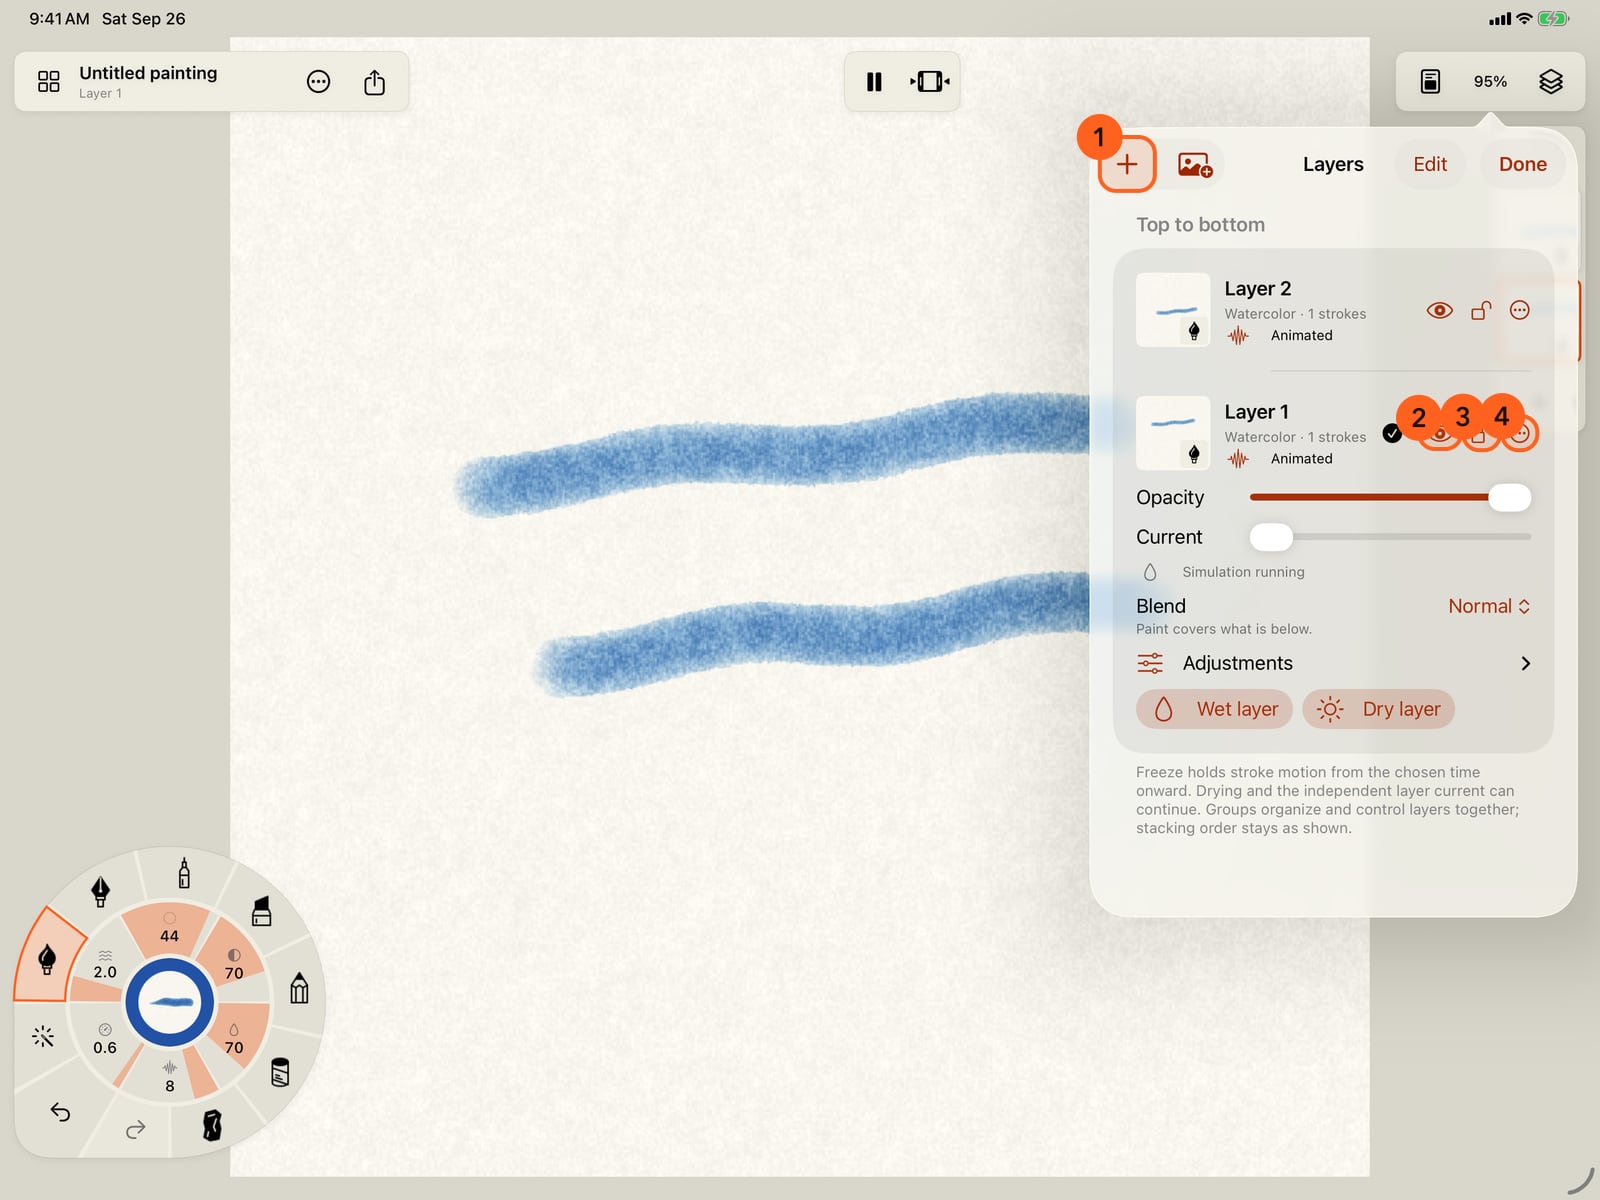
Tap Layers in the top bar for the Layers sheet. Each row has visibility, lock and a menu of the rest.
In the Layers sheet, each row has visibility, lock and a menu of the rest.
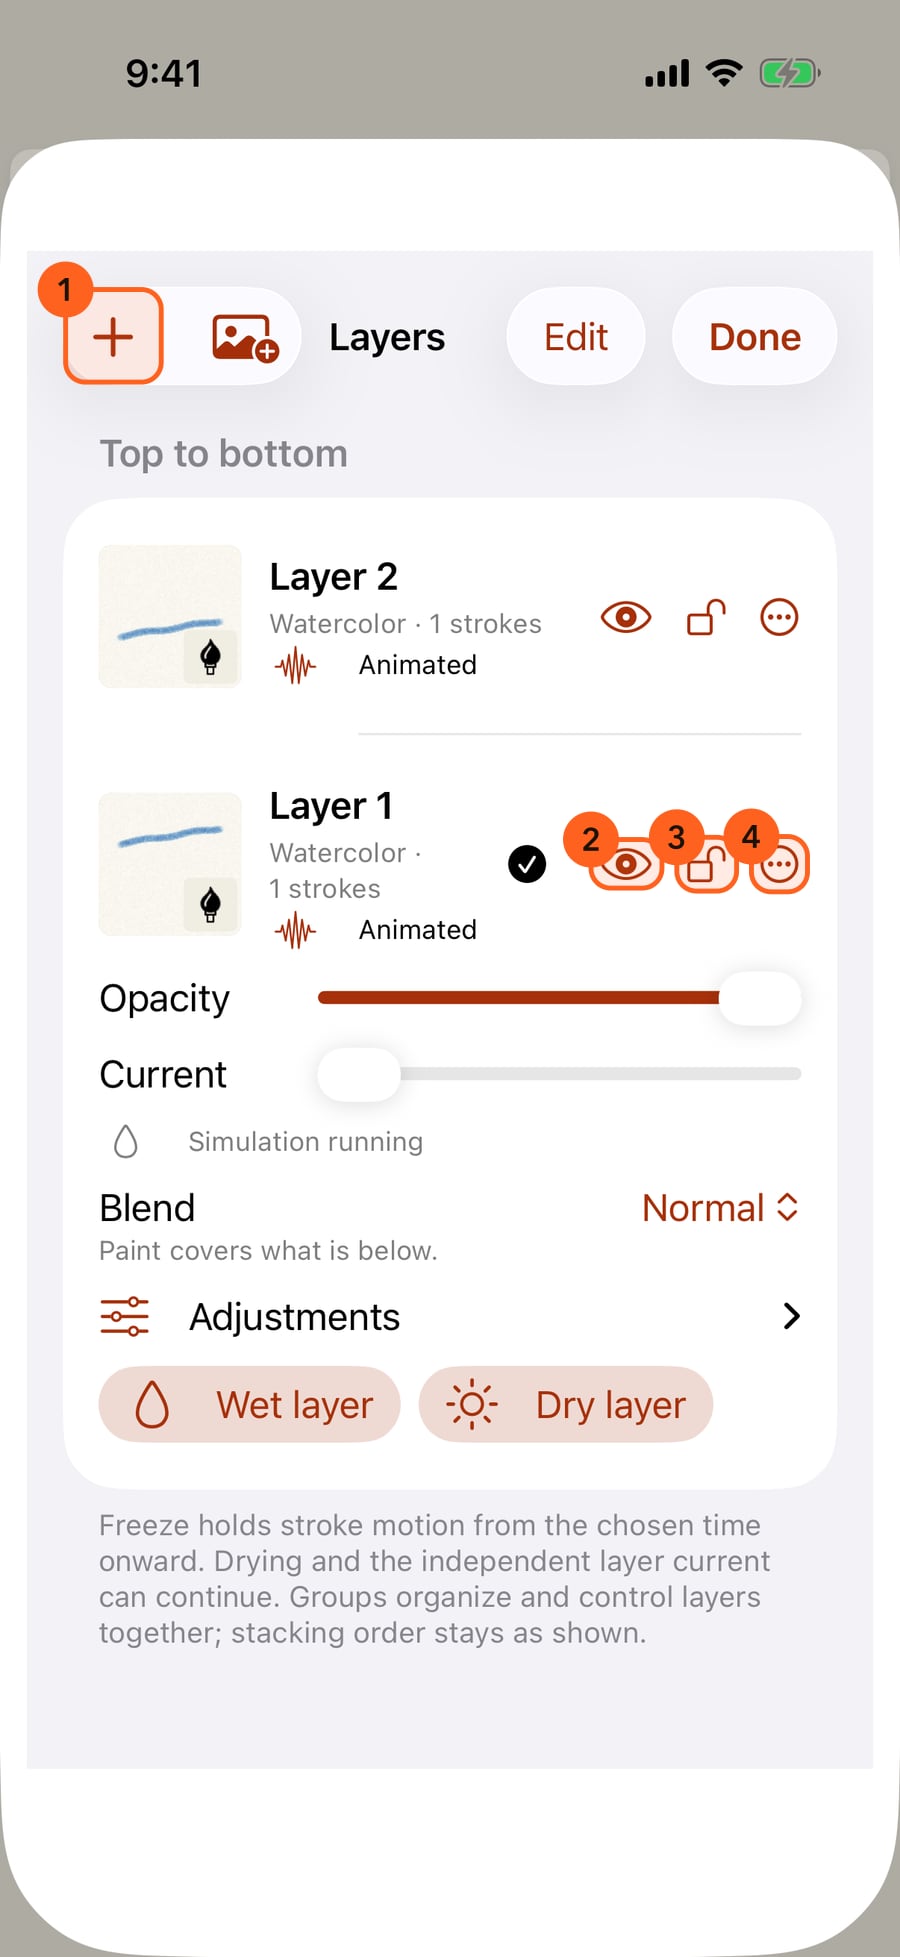
Click Layers in the top bar for the Layers sheet. Each row has visibility, lock and a menu of the rest.
The menu clears, renames, duplicates, freezes, groups, moves or deletes the layer.
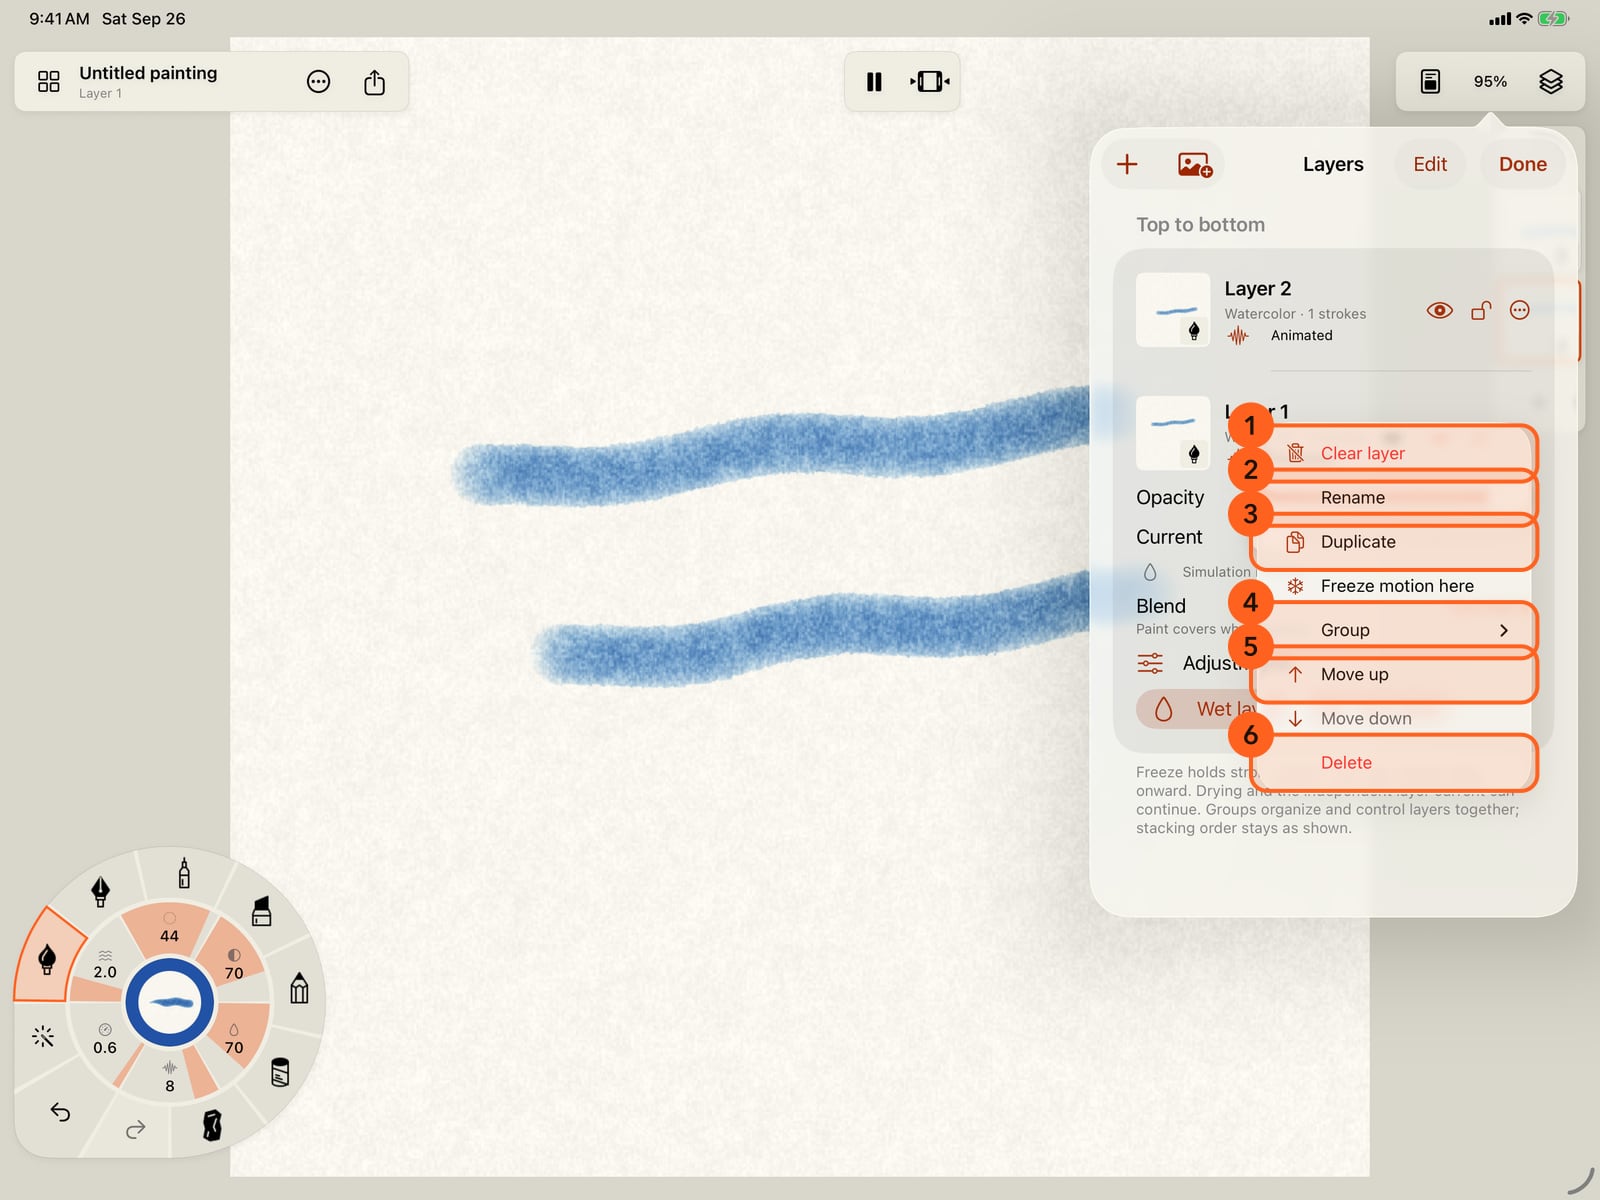
The menu clears, renames, duplicates, freezes, groups, moves or deletes the layer.
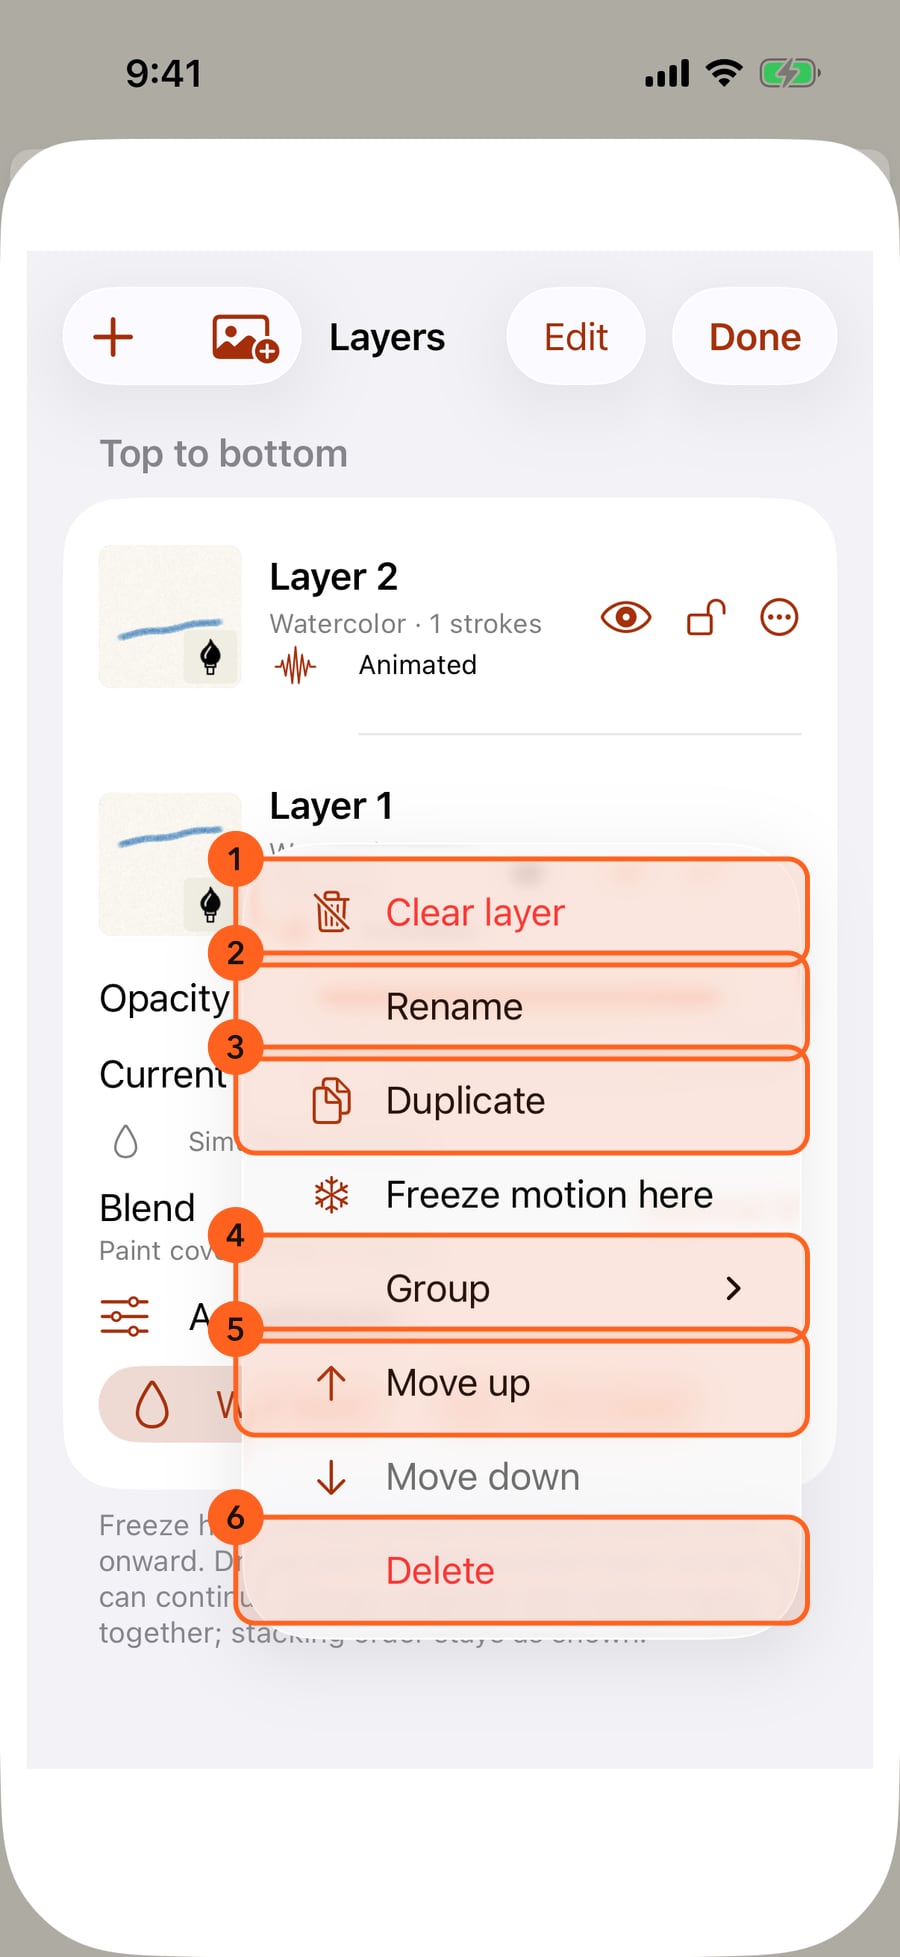
Move up takes Layer 1 above Layer 2. To reorder several, tap Edit and drag the handles.
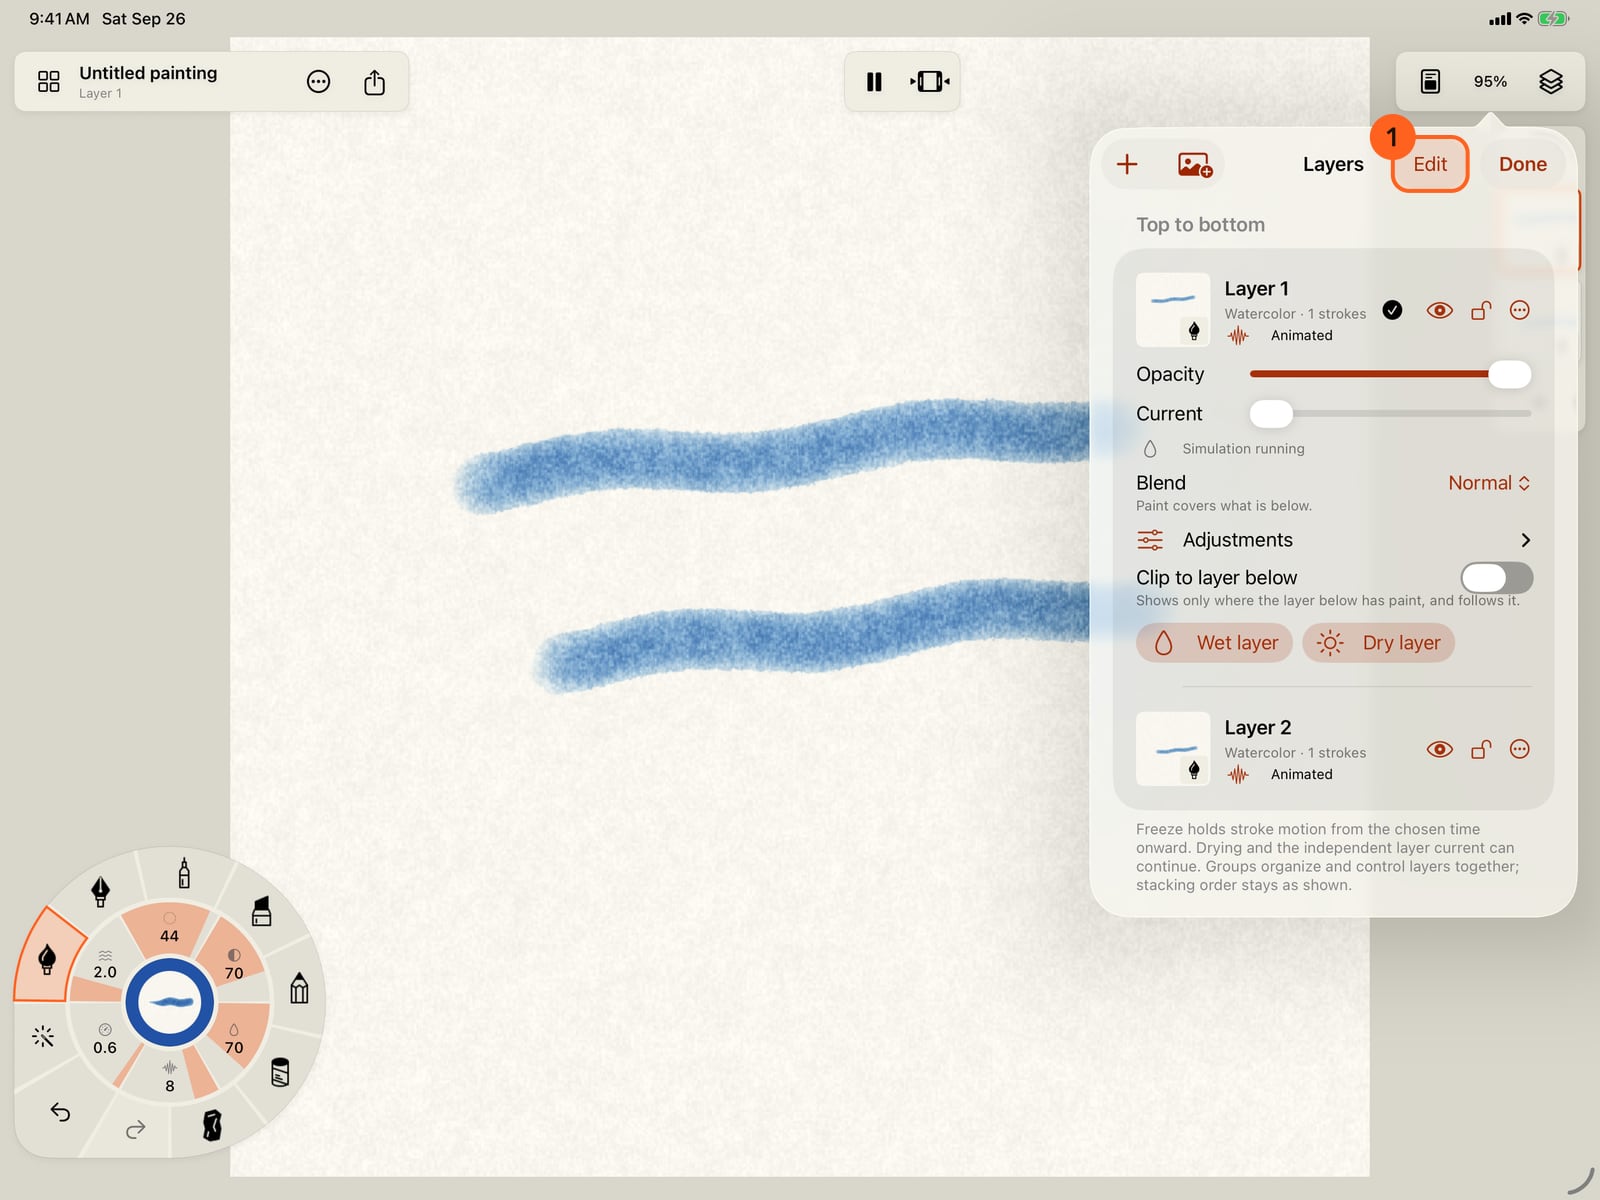
Move up takes Layer 1 above Layer 2. To reorder several, tap Edit and drag the handles.
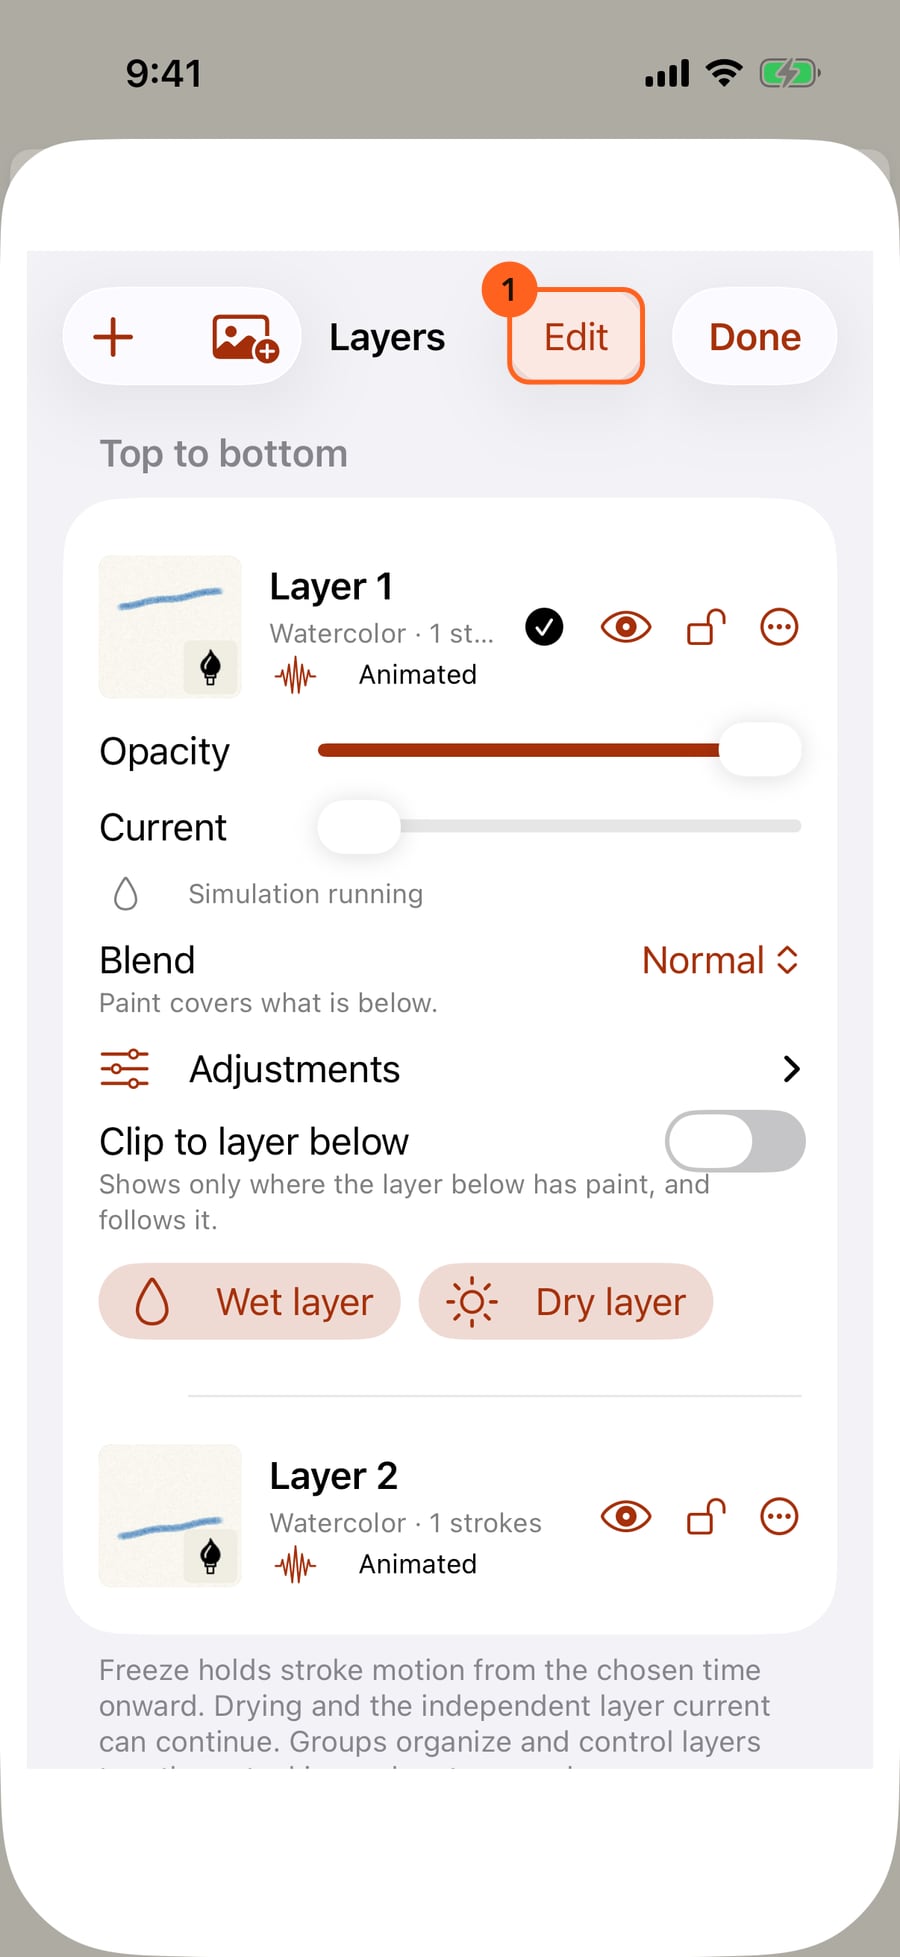
Move up takes Layer 1 above Layer 2. To reorder several, click Edit and drag the handles.
Tap Done. On the strip, touch and hold a thumbnail and drag it onto another to reorder, and the chevron at the top folds the strip down to the current layer.
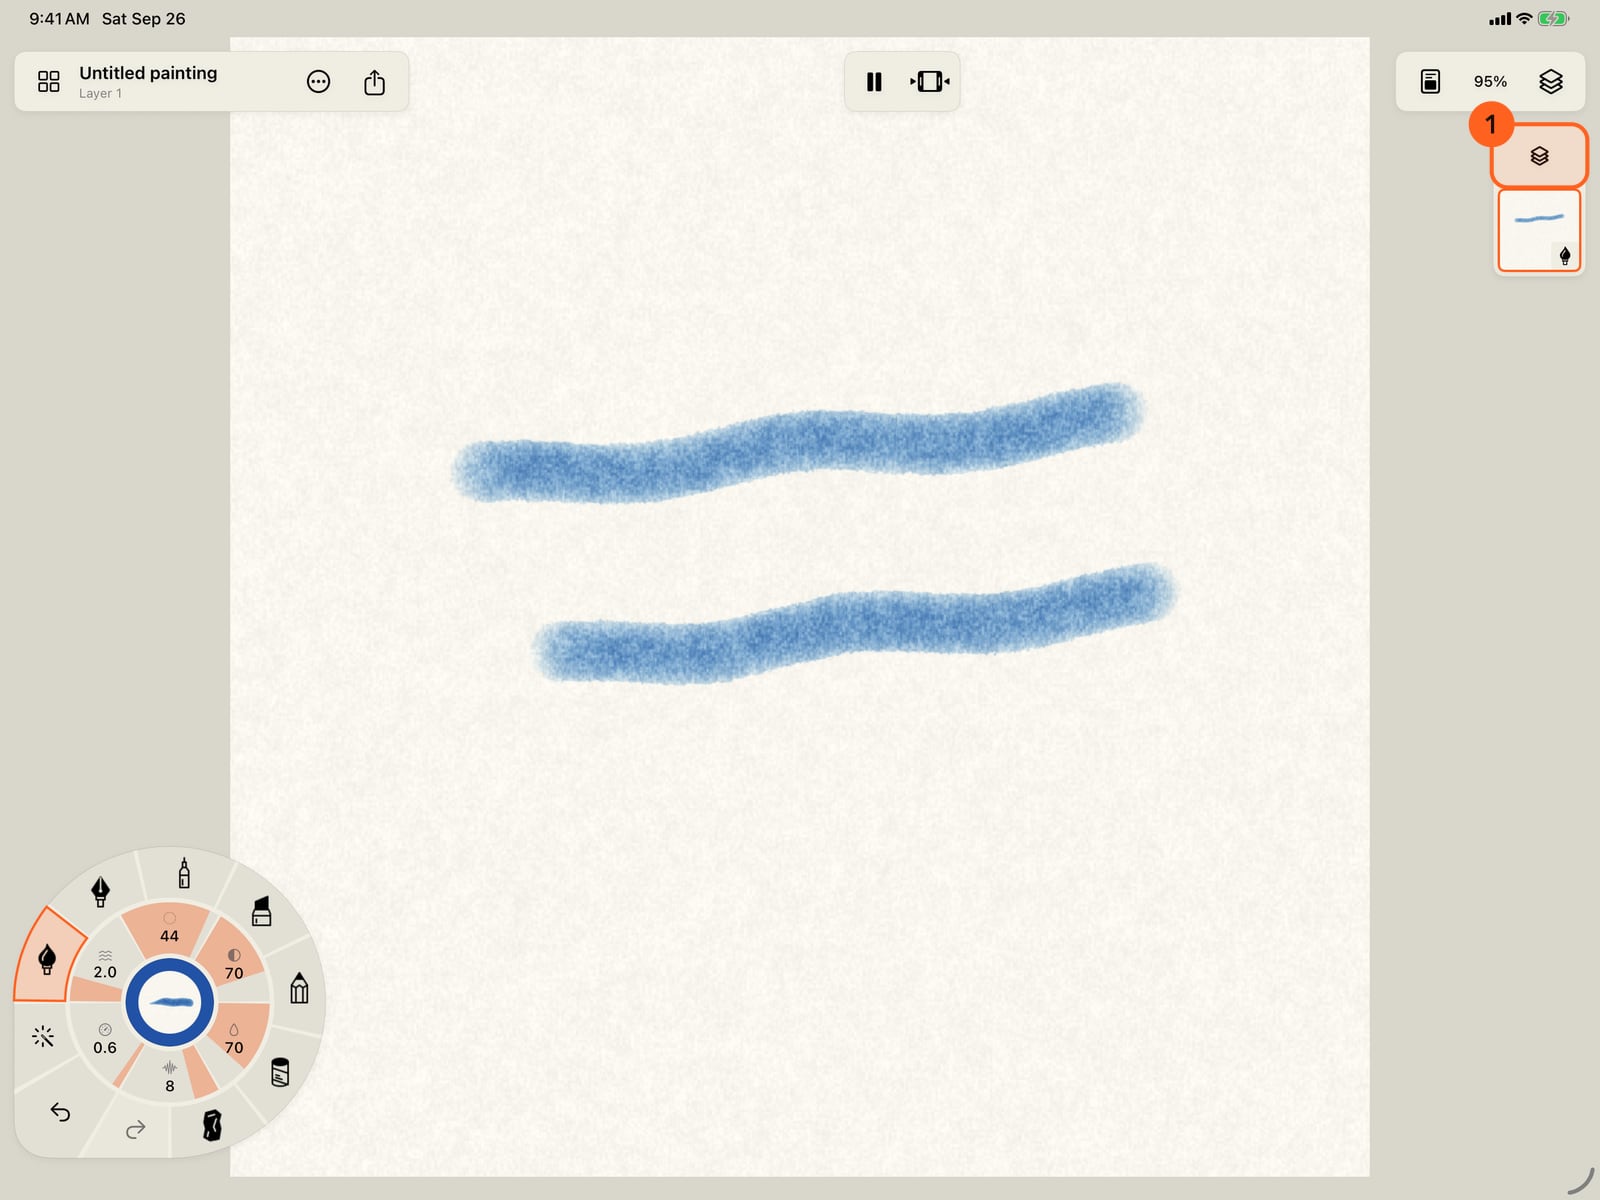
Click Done. On the strip, click and hold a thumbnail and drag it onto another to reorder, and the chevron at the top folds the strip down to the current layer.
The layer strip
On iPad and the Mac, the strip at the edge opposite the stroke wheel 1 shows every layer, top first, as a thumbnail with its medium's badge. A hidden layer is faded with an eye; a locked one shows a padlock.
- Tap a thumbnail to make it the current layer, outlined in orange. Your strokes go on the current layer.
- Tap the current layer for its controls in place: visibility, lock, opacity, blend, adjustments and more (see Layer blend modes and adjustments), Clear and Delete beside Move up and Move down, and All layer options… for the Layers sheet. Clearing empties the layer and keeps it; deleting removes it. Undo brings either back, and a note at the top says what happened.
- + (New layer) adds a layer on top, in the medium in hand.
- Touch and hold a thumbnail, then drag it onto another to take its place in the stack. Undo puts it back.
- The chevron at the top folds the strip to the current layer alone; the layers symbol opens it again.
On iPhone, and in any window narrower than 420 points, there is no strip. Everything is in the Layers sheet: tap Layers in the top bar.
The Layers sheet
Tap Layers in the top bar. The list runs top to bottom; tap a row to make it the current layer, marked with a tick, and its controls open beneath it.
| Control | What it does |
|---|---|
| Add layer (+) | Adds a layer on top. |
| Add image | Adds a picture as a layer: see Image layers. |
| Edit | Shows handles to drag layers into a new order. |
| Eye | Hides or shows the layer. |
| Padlock | Locks the layer so it can't be painted on, moved or changed. |
| ⋯ menu | The rest, below. |
The ⋯ menu:
| Item | What it does |
|---|---|
| Clear layer | Removes every stroke from the layer, keeping the layer. Undo brings them back. |
| Rename | Names the layer. |
| Duplicate | Copies the layer and its strokes. |
| Freeze motion here / Unfreeze motion | Holds every stroke on the layer still from now on: see Paint motion onto strokes. |
| Group | New group… puts the layer in a new named group, a group's name adds it to that group, and Ungroup takes it out. |
| Move up / Move down | Moves the layer one place. |
| Delete | Deletes the layer. A painting always keeps at least one; a locked layer can't be deleted. |
Groups
Groups gather layers so you can control them together. They appear at the top of the sheet, each with a menu to Show all, Hide all, Lock all, Unlock all or Remove group. The stacking order stays as the list shows it. Two or more watercolour (or ink) layers in a group can Mix paint: see Layer blend modes and adjustments.
One medium per layer
Each layer holds one medium, shown by its badge. When you take up a brush of another medium, Doodly Doodle changes an empty layer to it, switches to a layer of that medium, or adds one, and says which.
Pro: Free paintings have up to 3 paint layers; Pro has up to 16. Image layers never count. On Free, the end of the Layers sheet shows what Pro adds, and reaching for a fourth paint layer (with +, Duplicate, or a brush that needs a layer of its own) opens Free and Pro on Sixteen layers with Pro, with the ways to keep going in Free. How many layers fit also depends on the canvas size and on your device's memory.
On the Mac, drag a thumbnail in the strip to reorder layers.
Something not behaving as expected?
Visit support or write to [email protected].