

Guides / Layers
Layer blend modes and adjustments
Change how a layer meets the layers below with opacity and blend modes, adjust its colour and tone, and let grouped wet layers mix.
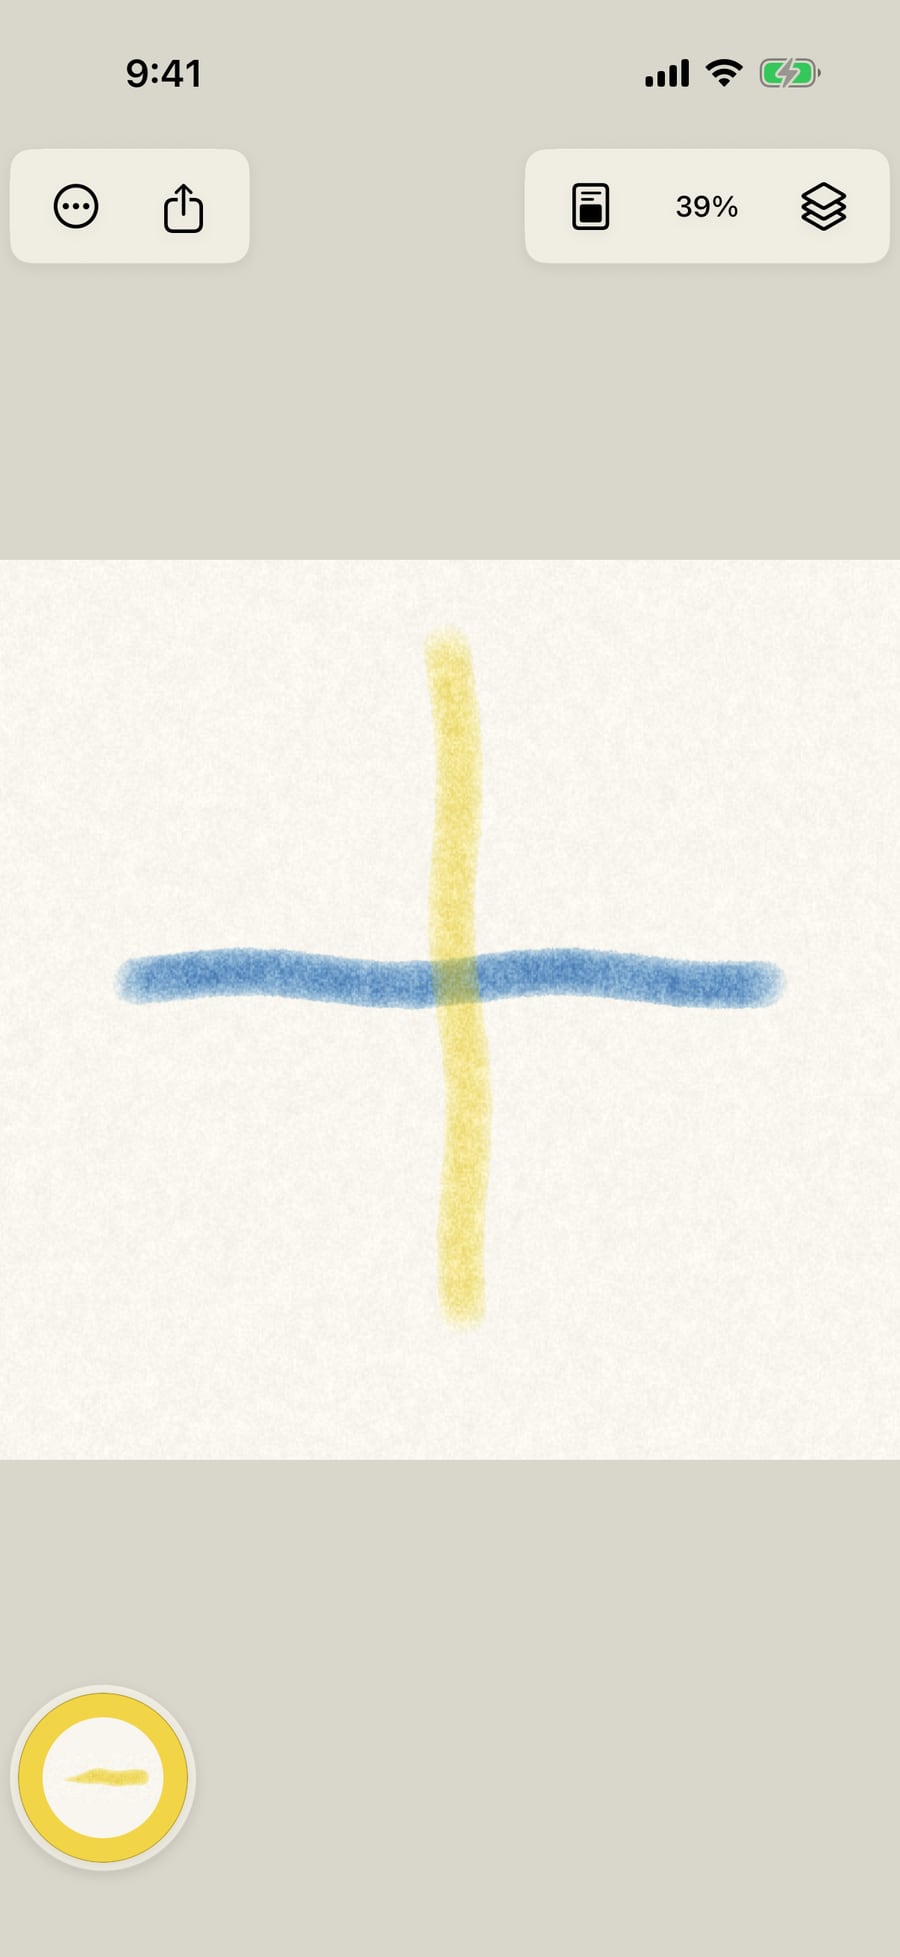
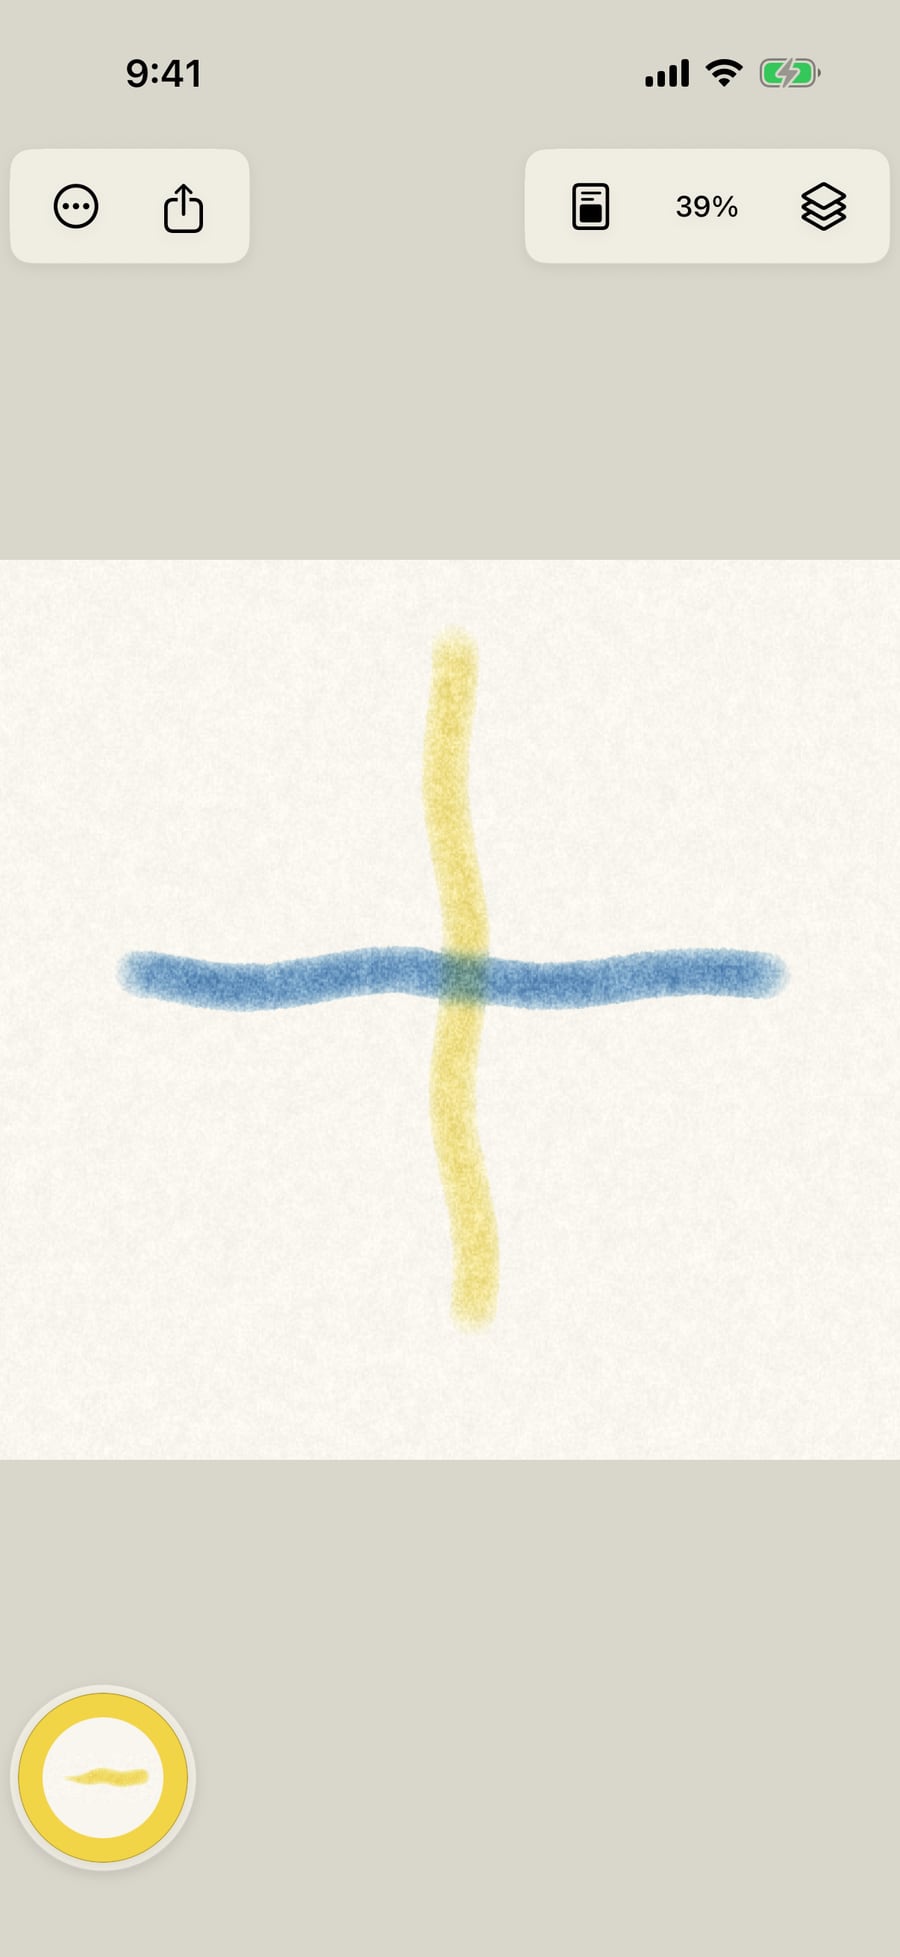
Paint a blue stroke, add a layer, and paint across it in yellow. On a Normal layer, the yellow covers the blue where they cross.
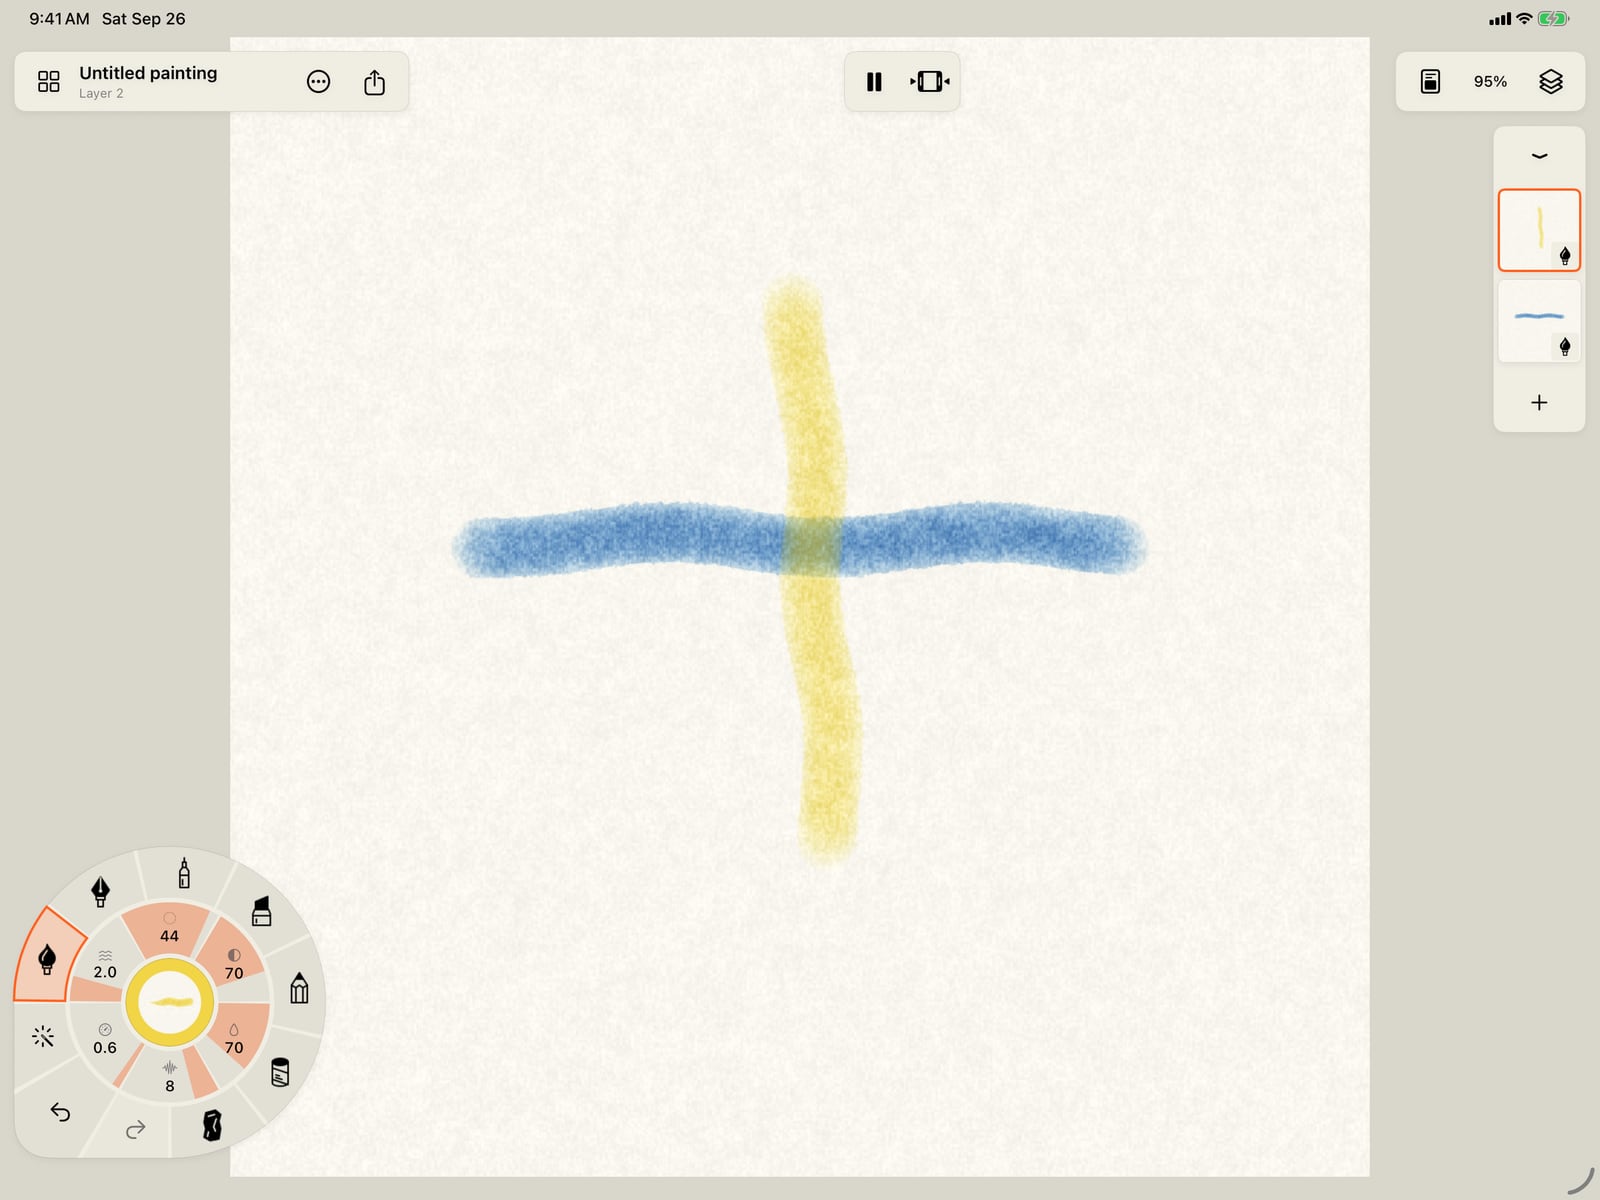
Paint a blue stroke, add a layer from Layers, and paint across it in yellow. On a Normal layer, the yellow covers the blue where they cross.
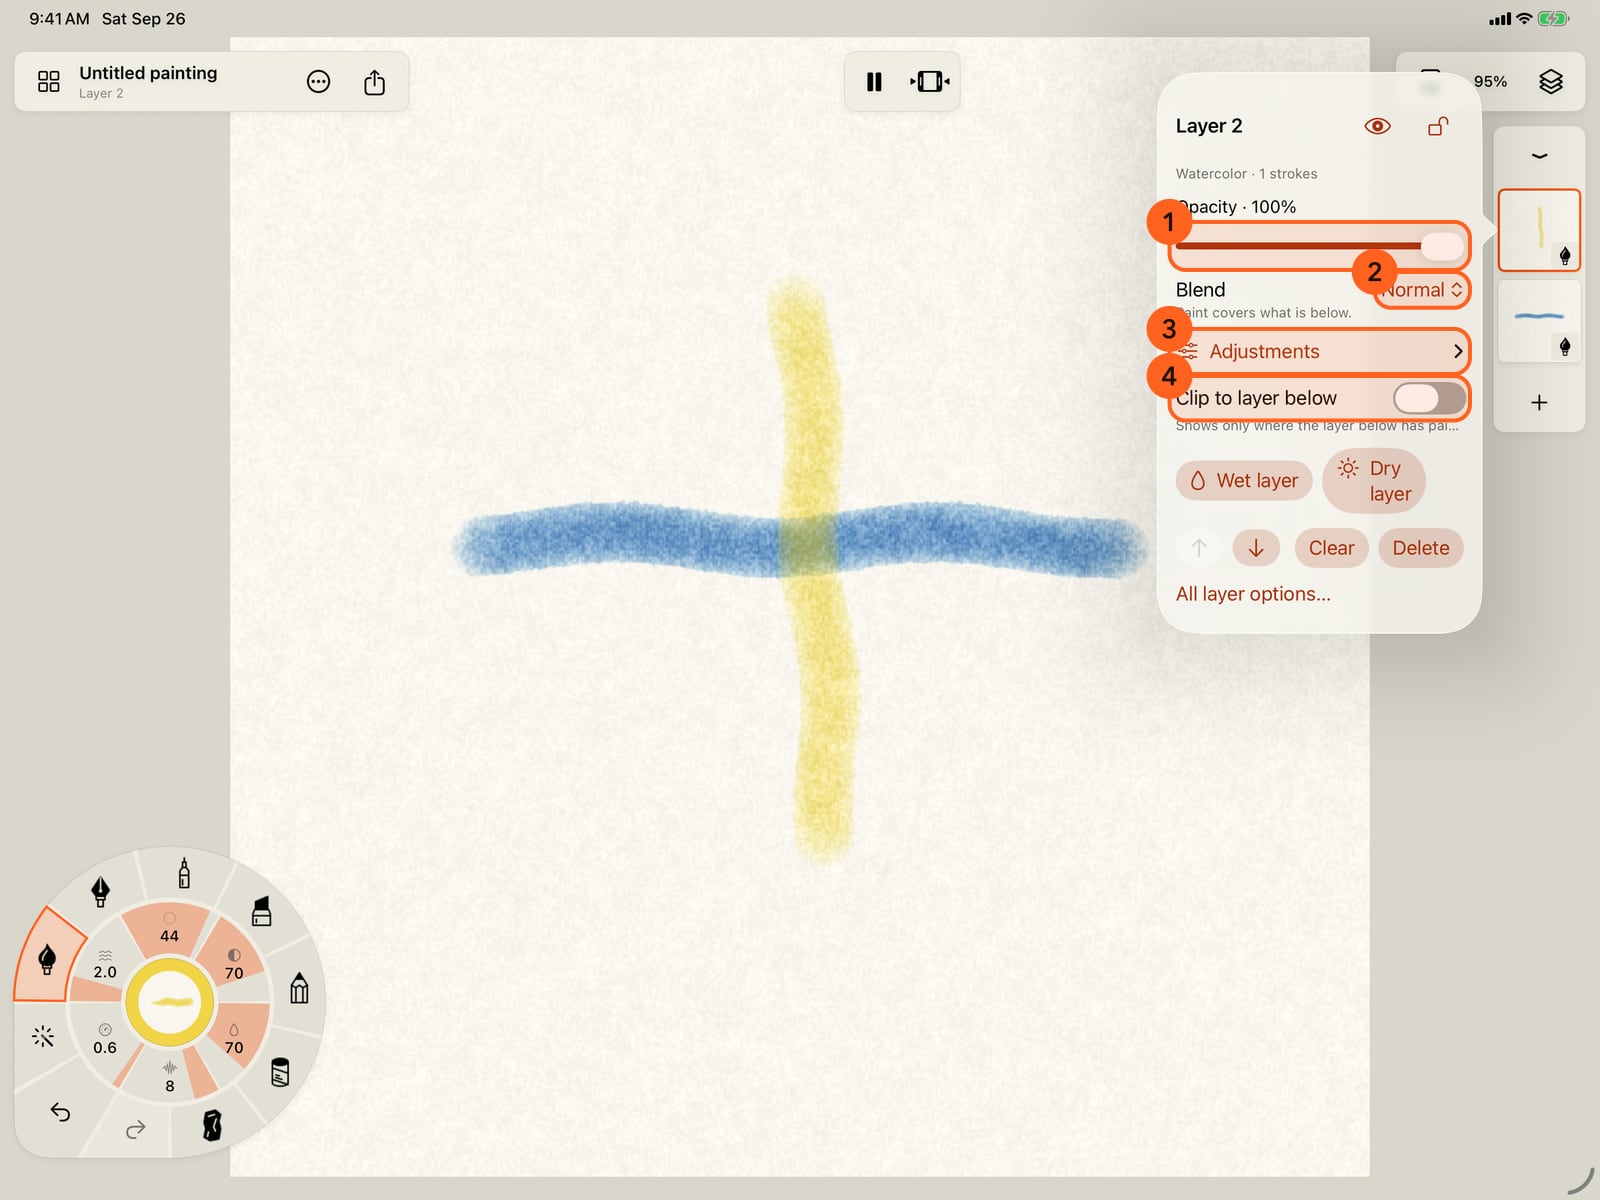
Tap the current layer's thumbnail for its controls. Opacity, Blend, Adjustments and Clip to layer below change how it looks, not its paint.
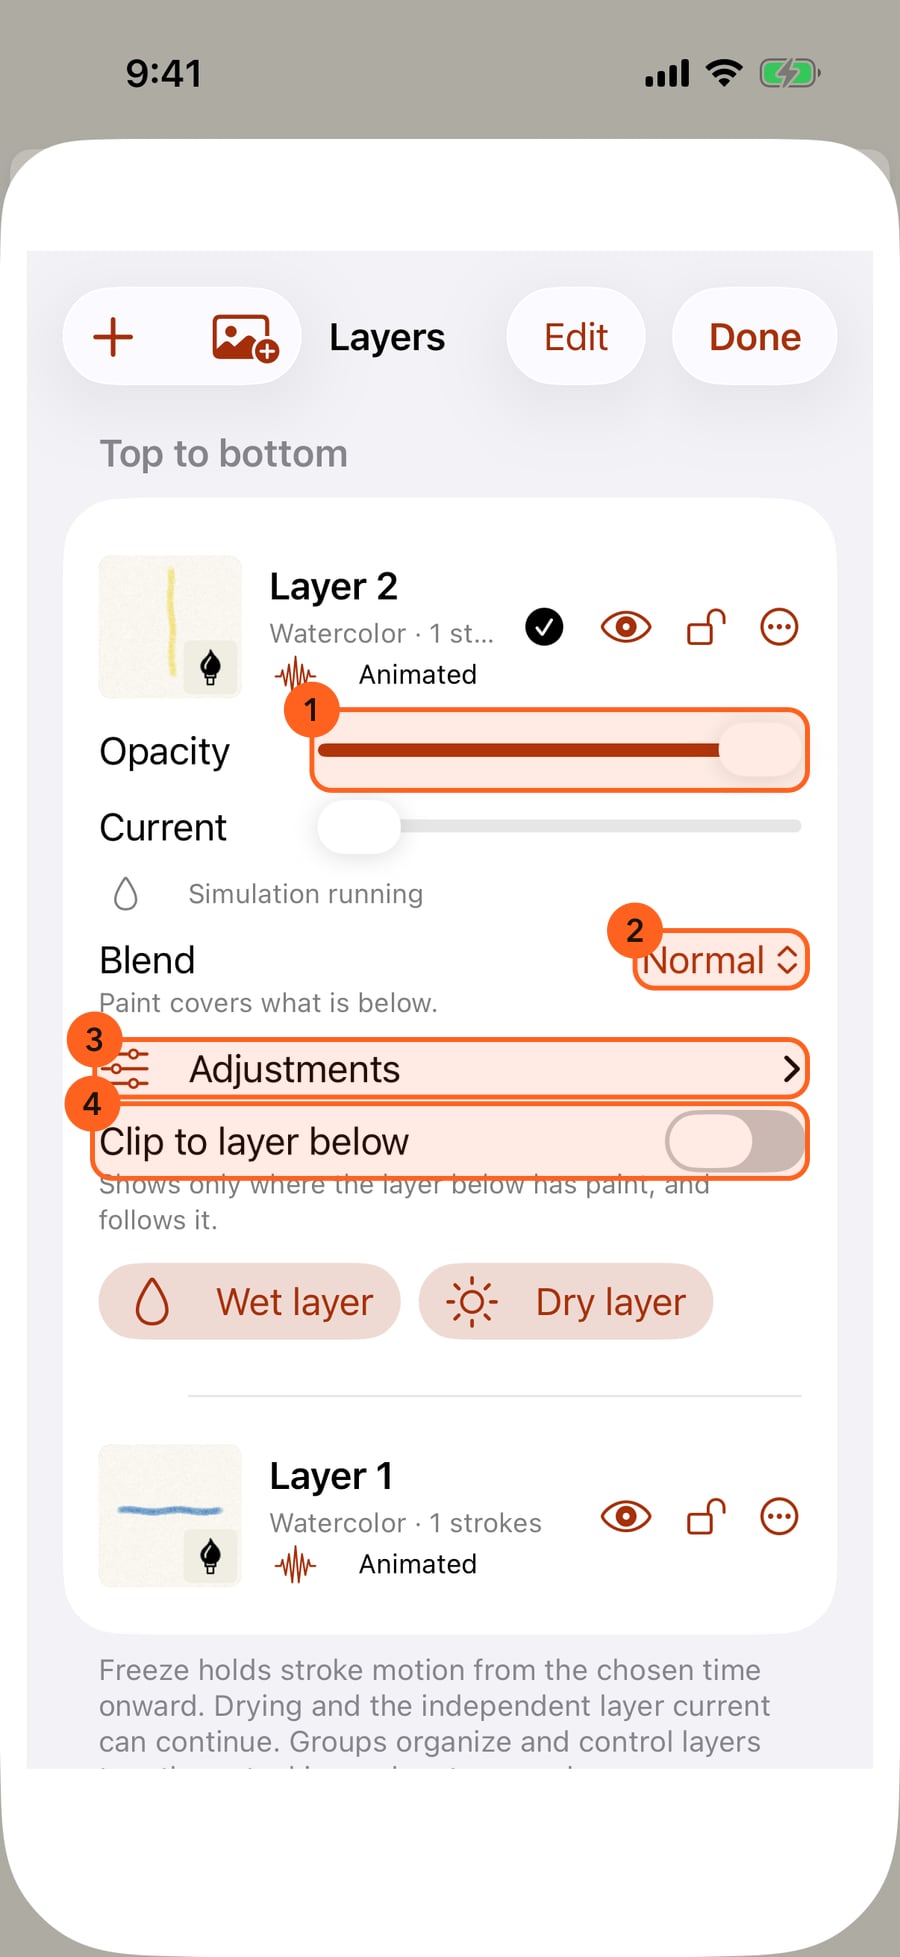
Open Layers, where the current layer's controls sit beneath it. Opacity, Blend, Adjustments and Clip to layer below change how it looks, not its paint.
Click the current layer's thumbnail for its controls. Opacity, Blend, Adjustments and Clip to layer below change how it looks, not its paint.
Tap Blend. Normal covers, Glaze tints like a transparent wash, Multiply darkens, Screen and Add lighten, and Lighten keeps the lighter colour.
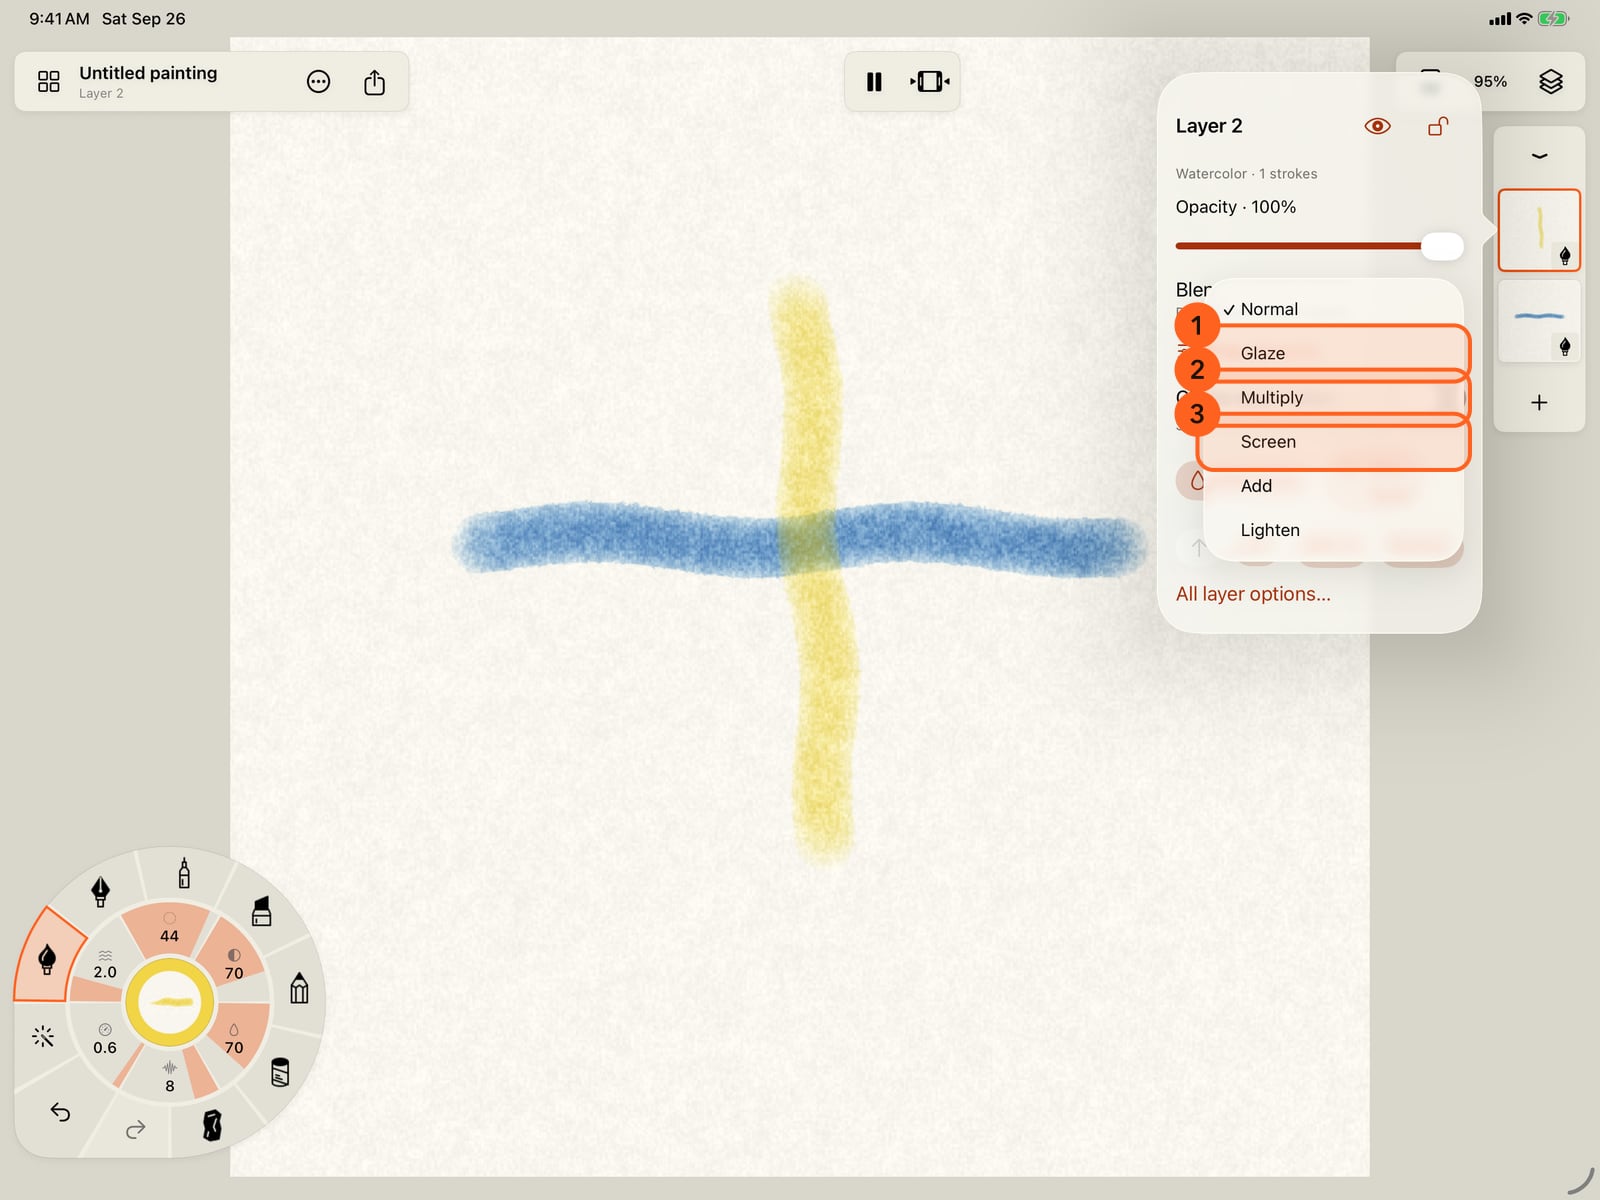
Tap Blend. Normal covers, Glaze tints like a transparent wash, Multiply darkens, Screen and Add lighten, and Lighten keeps the lighter colour.
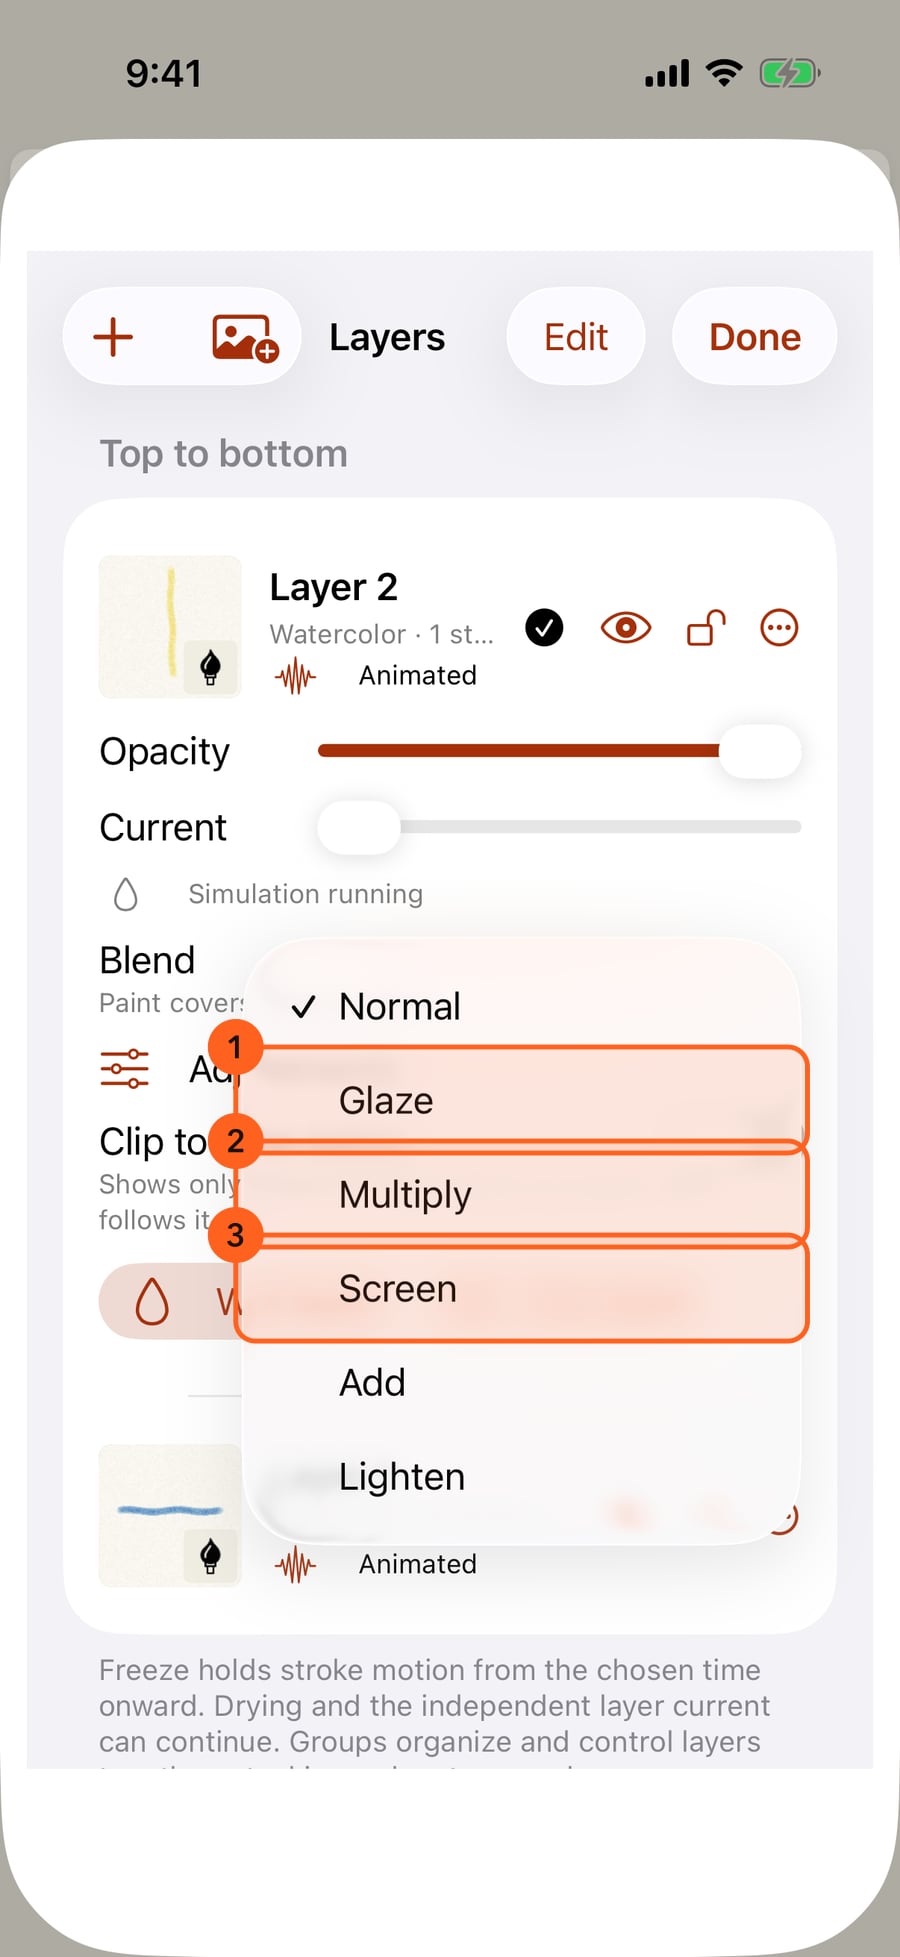
Click Blend. Normal covers, Glaze tints like a transparent wash, Multiply darkens, Screen and Add lighten, and Lighten keeps the lighter colour.
Choose Multiply and close the controls. Compared with the first picture, the yellow now darkens the blue to green where they cross, instead of covering it.
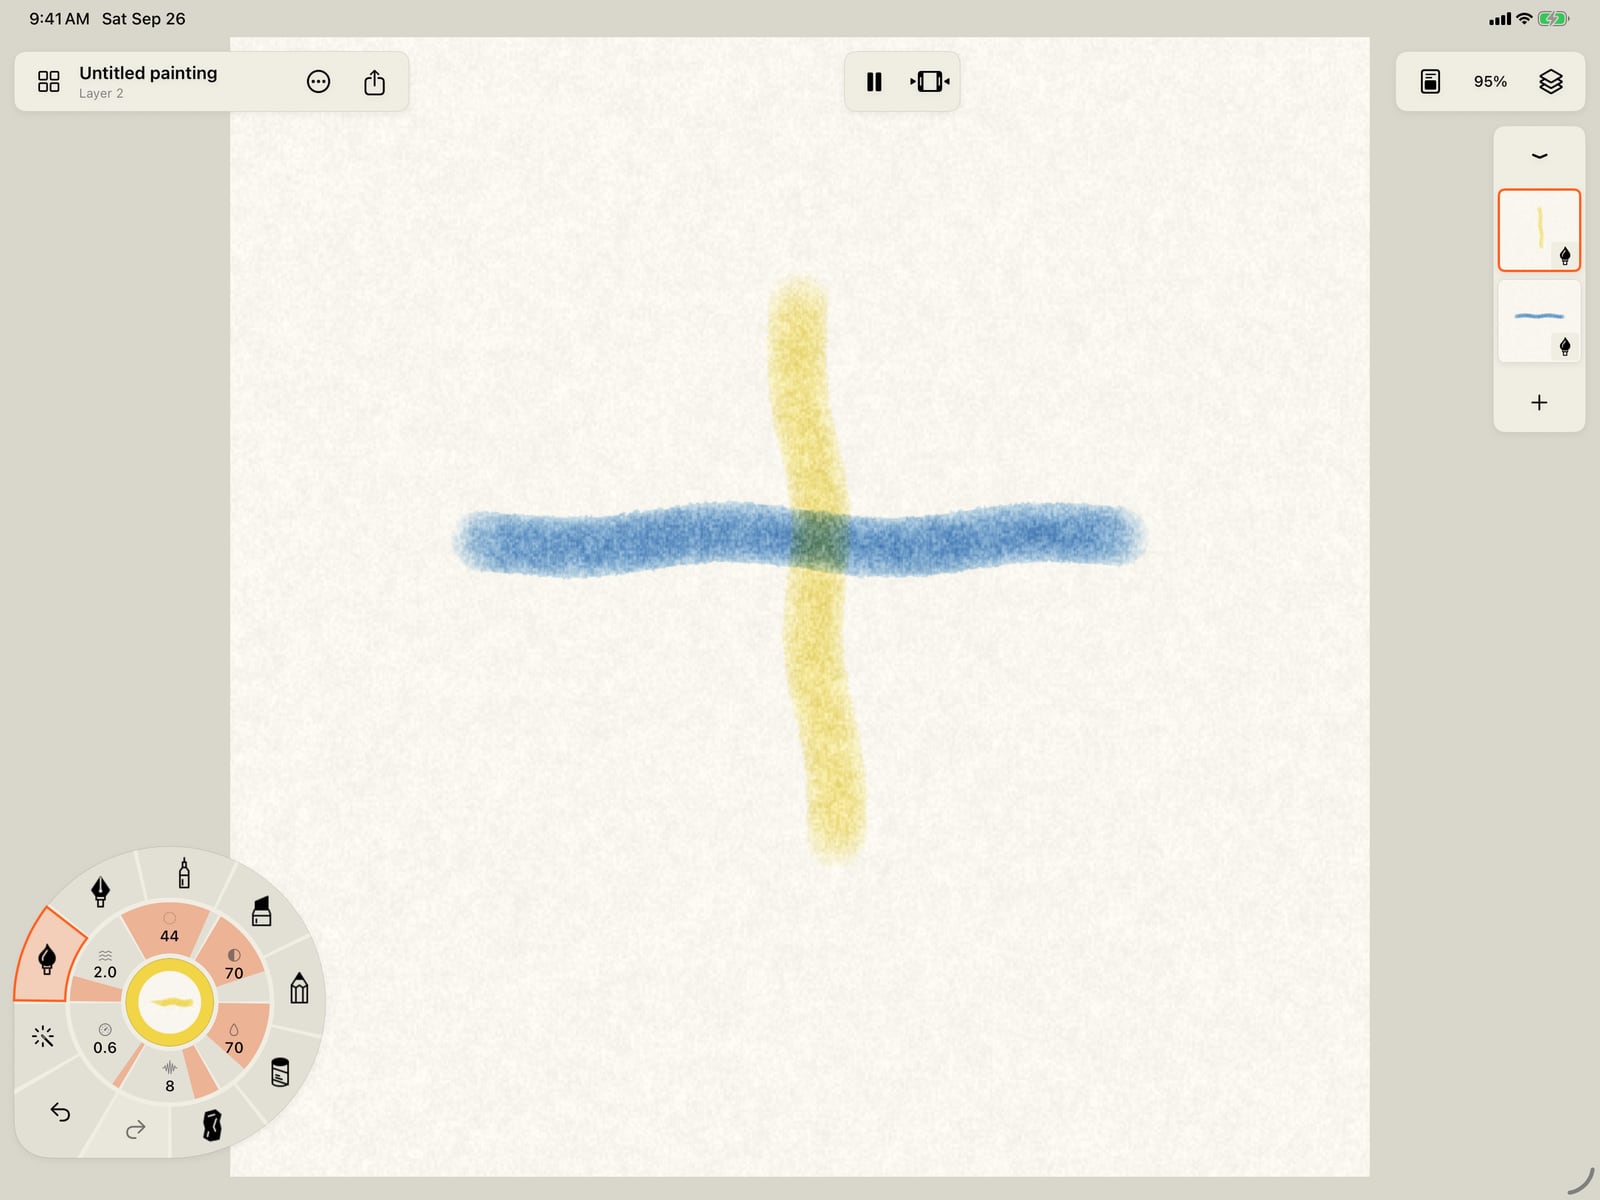
Choose Multiply and tap Done. Compared with the first picture, the yellow now darkens the blue to green where they cross, instead of covering it.
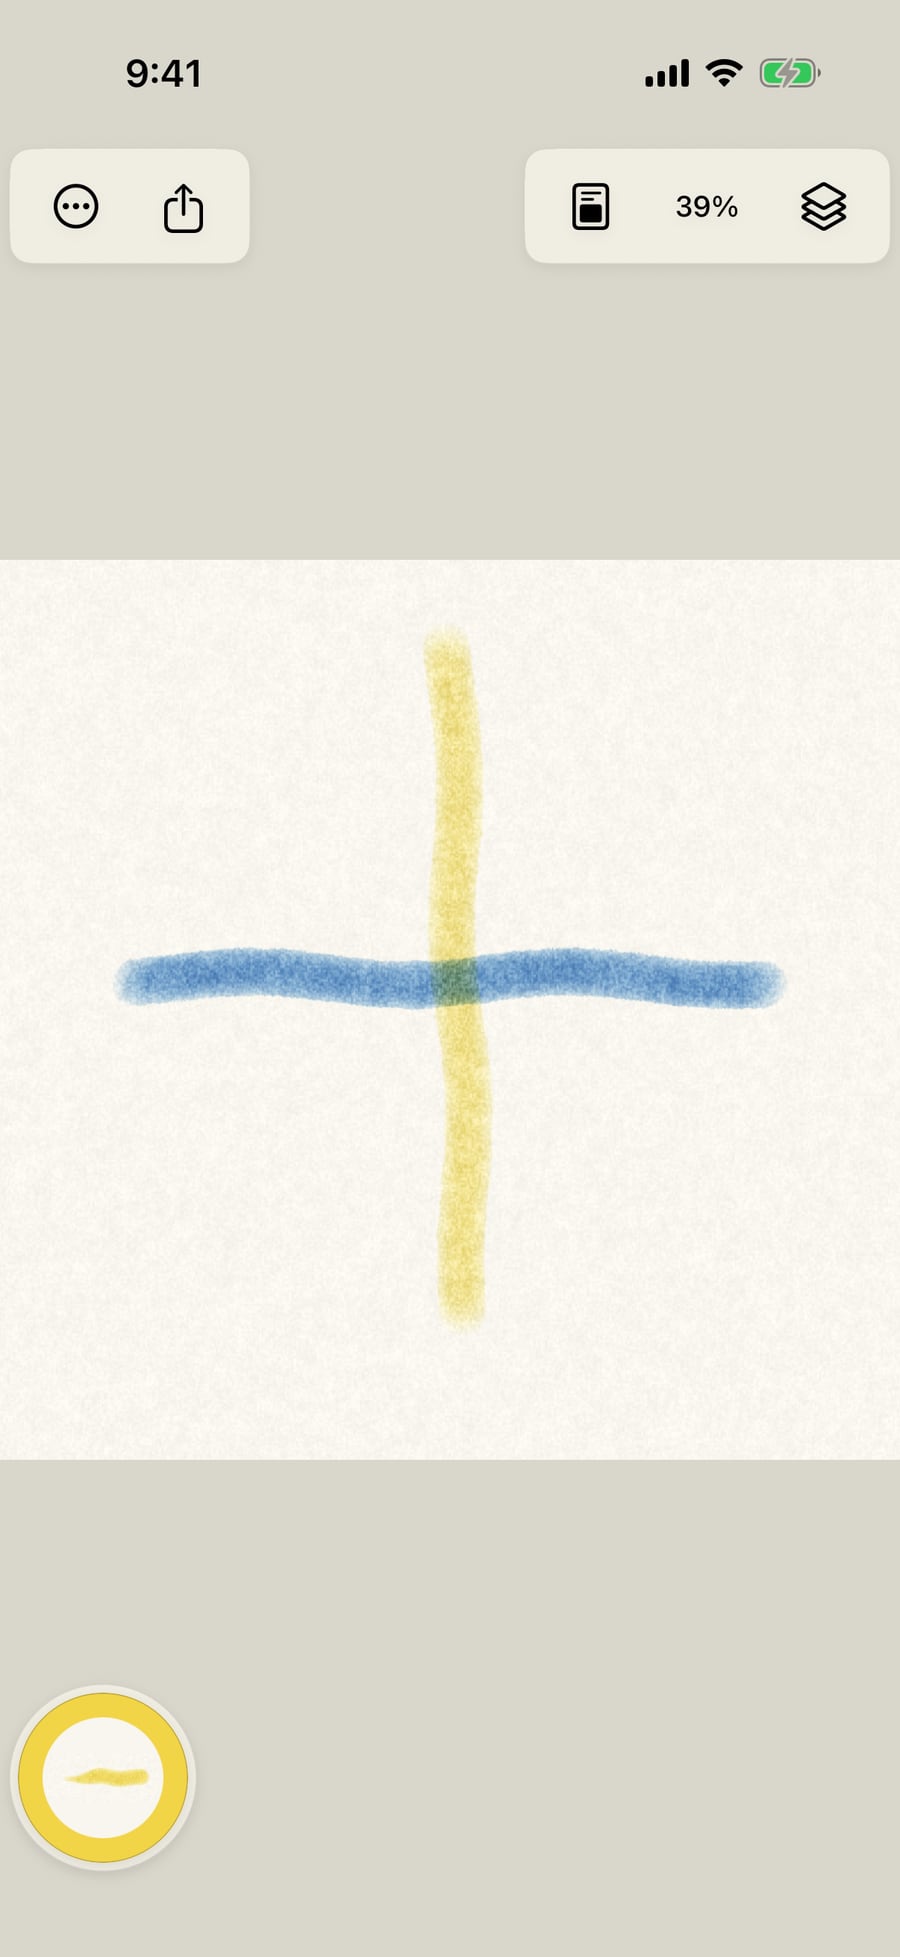
Open the controls again and tap Adjustments. Hue turns every colour on the layer, here yellow to green-blue, and Saturation, Brightness, the levels, a tone curve and Blur work the same way.
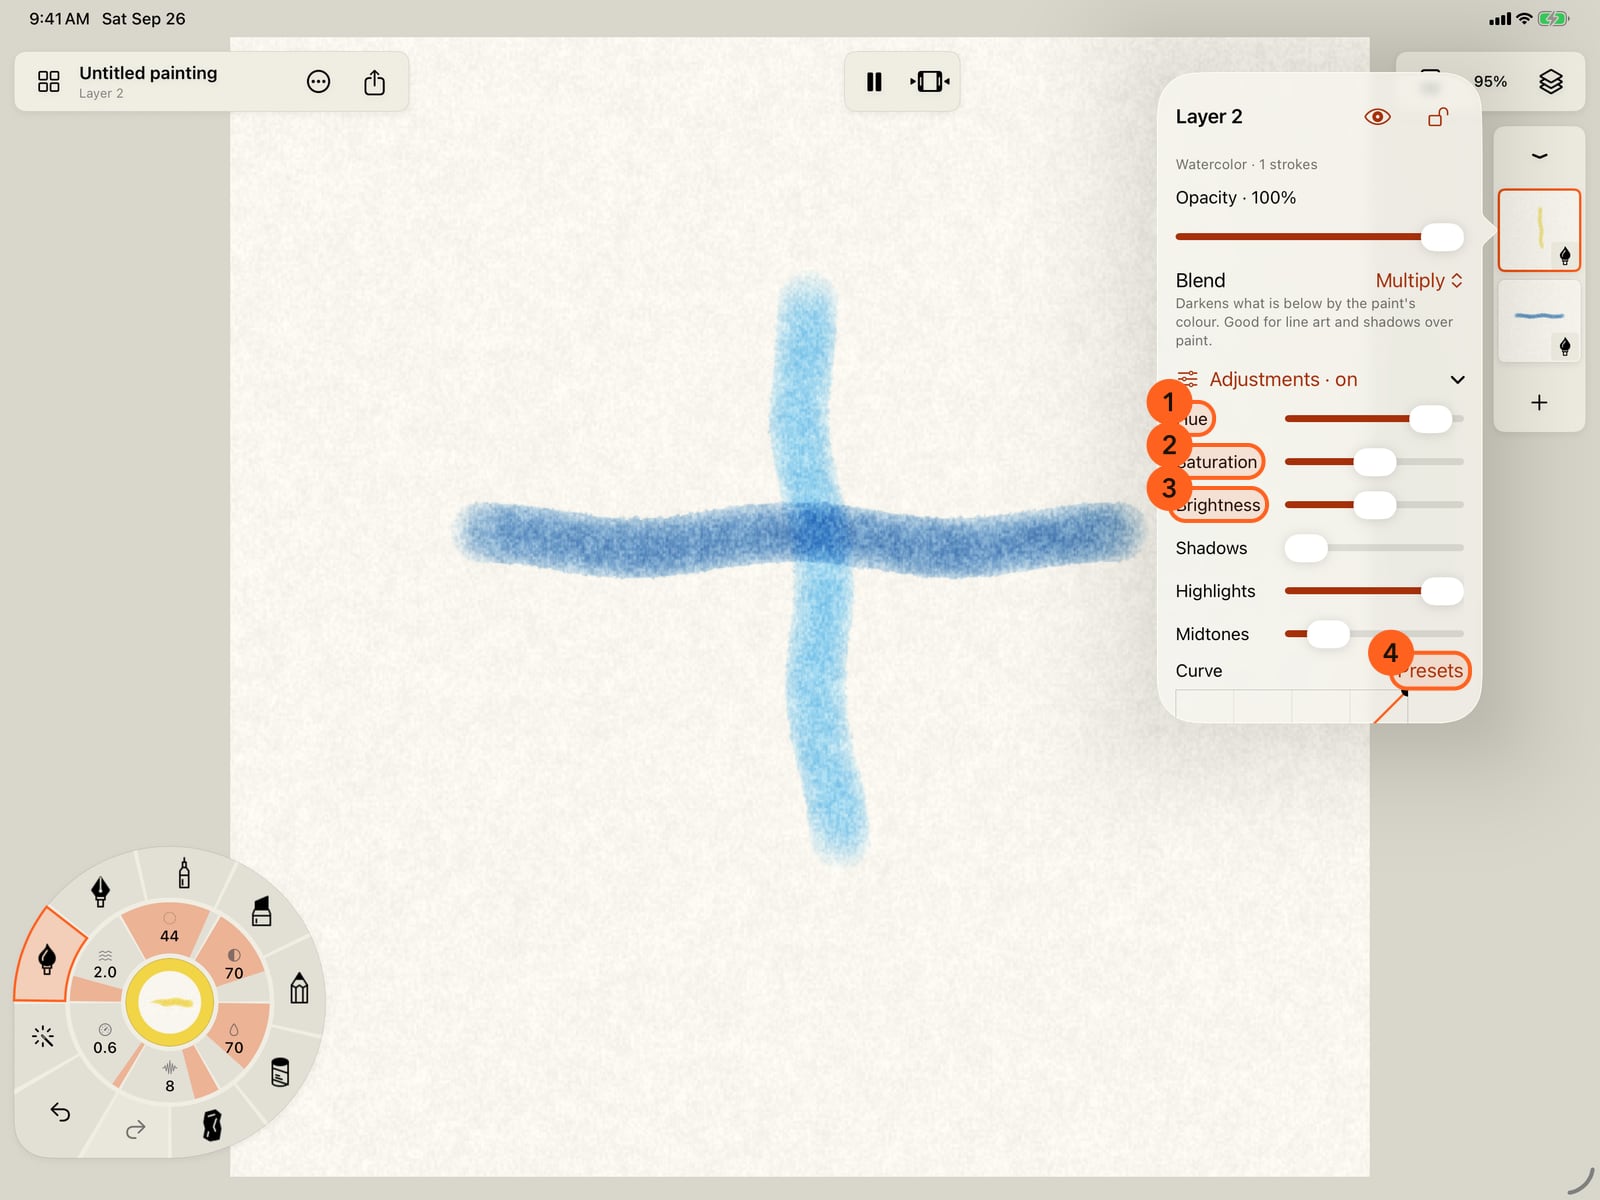
Open the controls again and tap Adjustments. Hue turns every colour on the layer, here yellow to green-blue, and Saturation, Brightness, the levels, a tone curve and Blur work the same way.
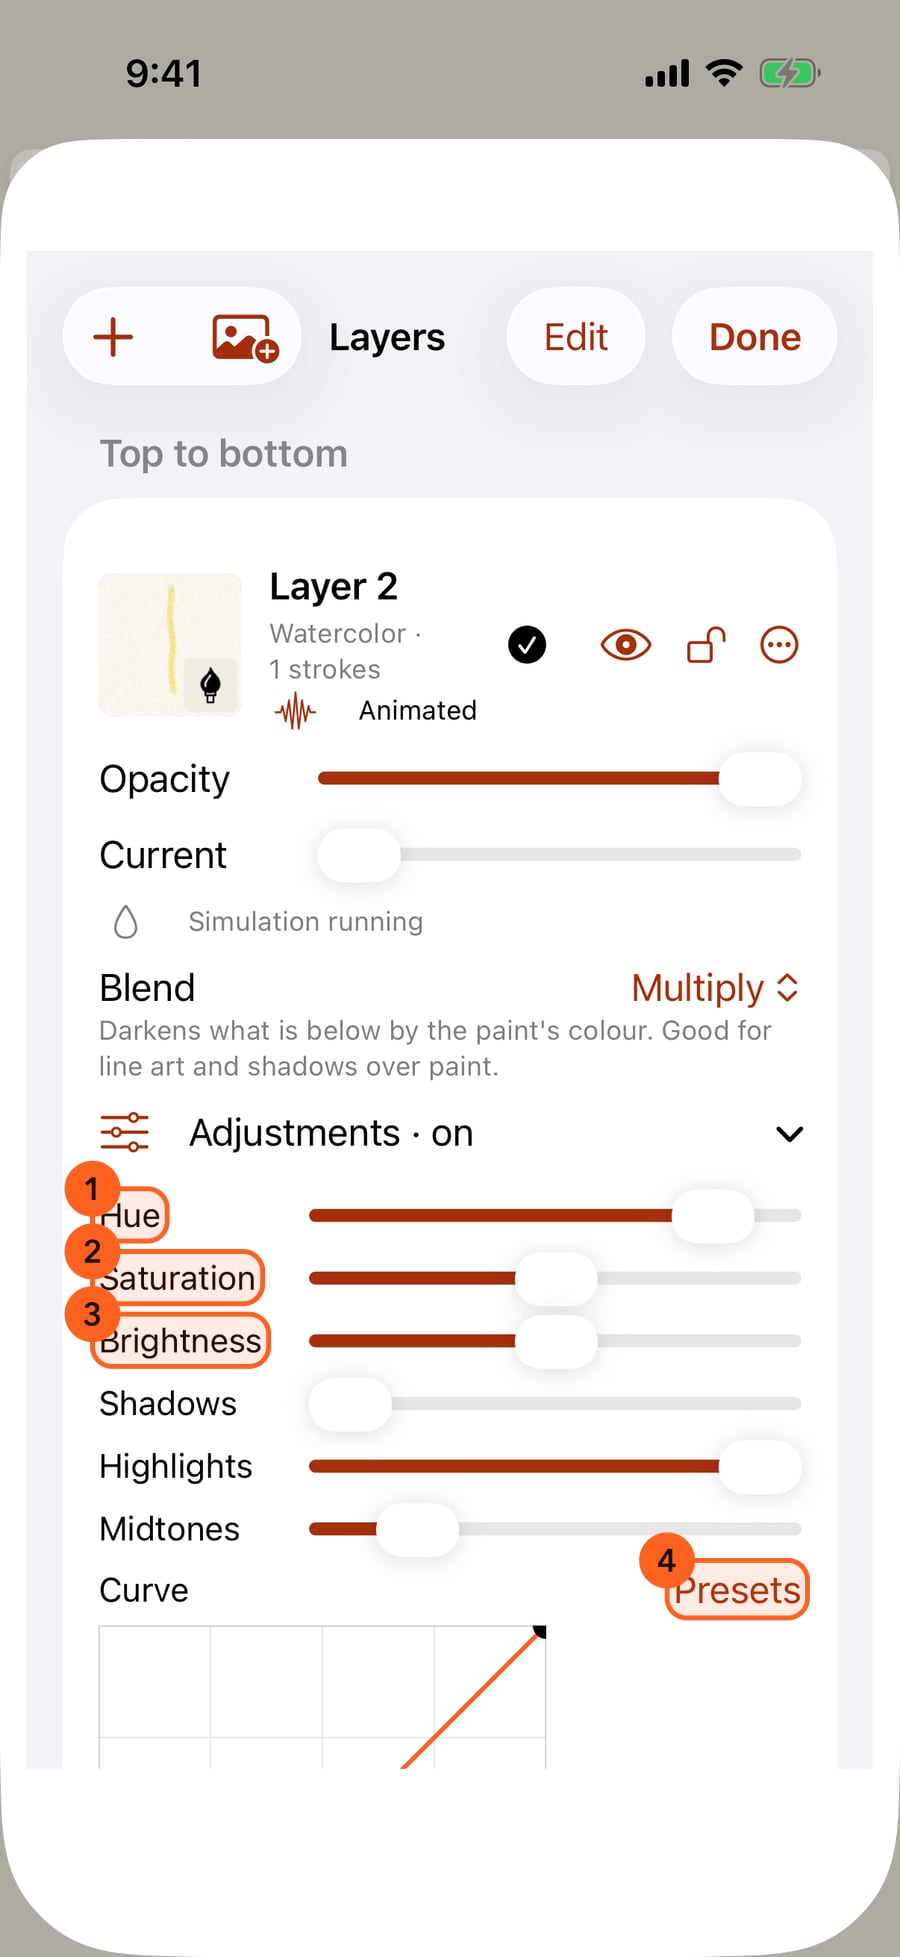
Open the controls again and click Adjustments. Hue turns every colour on the layer, here yellow to green-blue, and Saturation, Brightness, the levels, a tone curve and Blur work the same way.
The Layers sheet has one more control for wet layers. Current keeps the layer's wet paint drifting on its own, long after the strokes are painted.
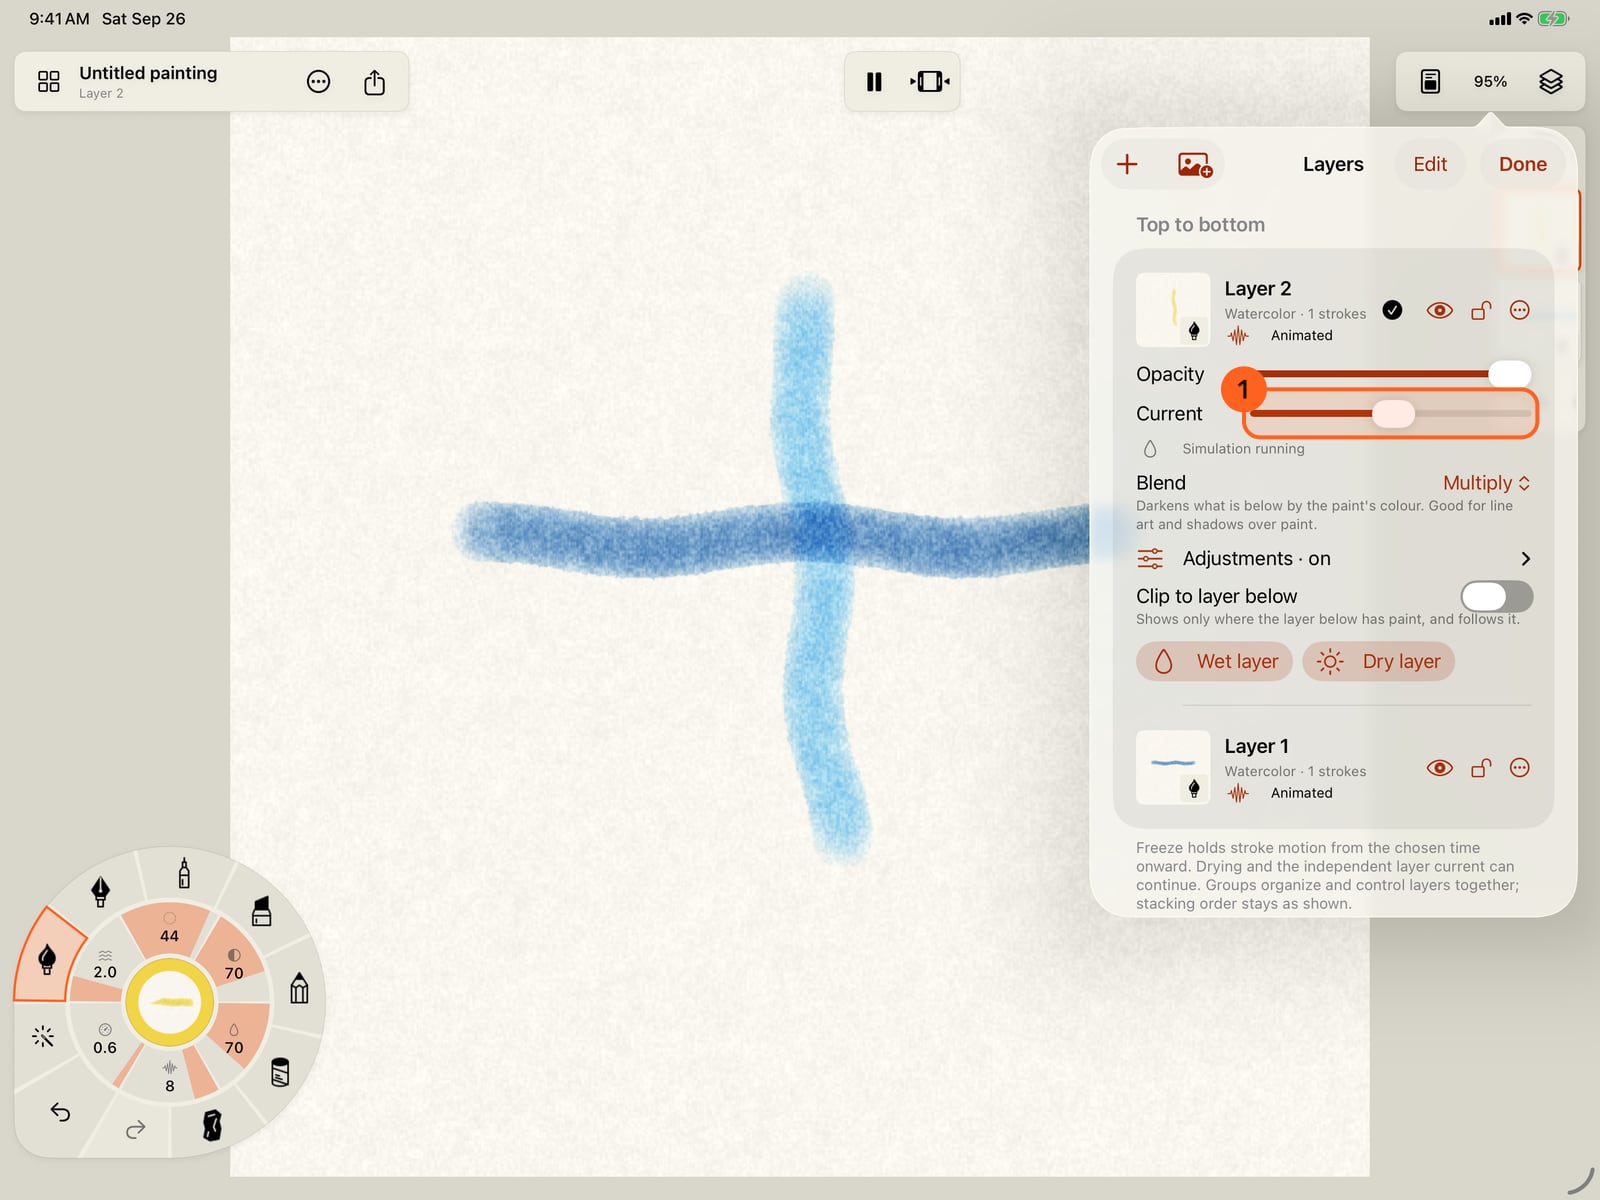
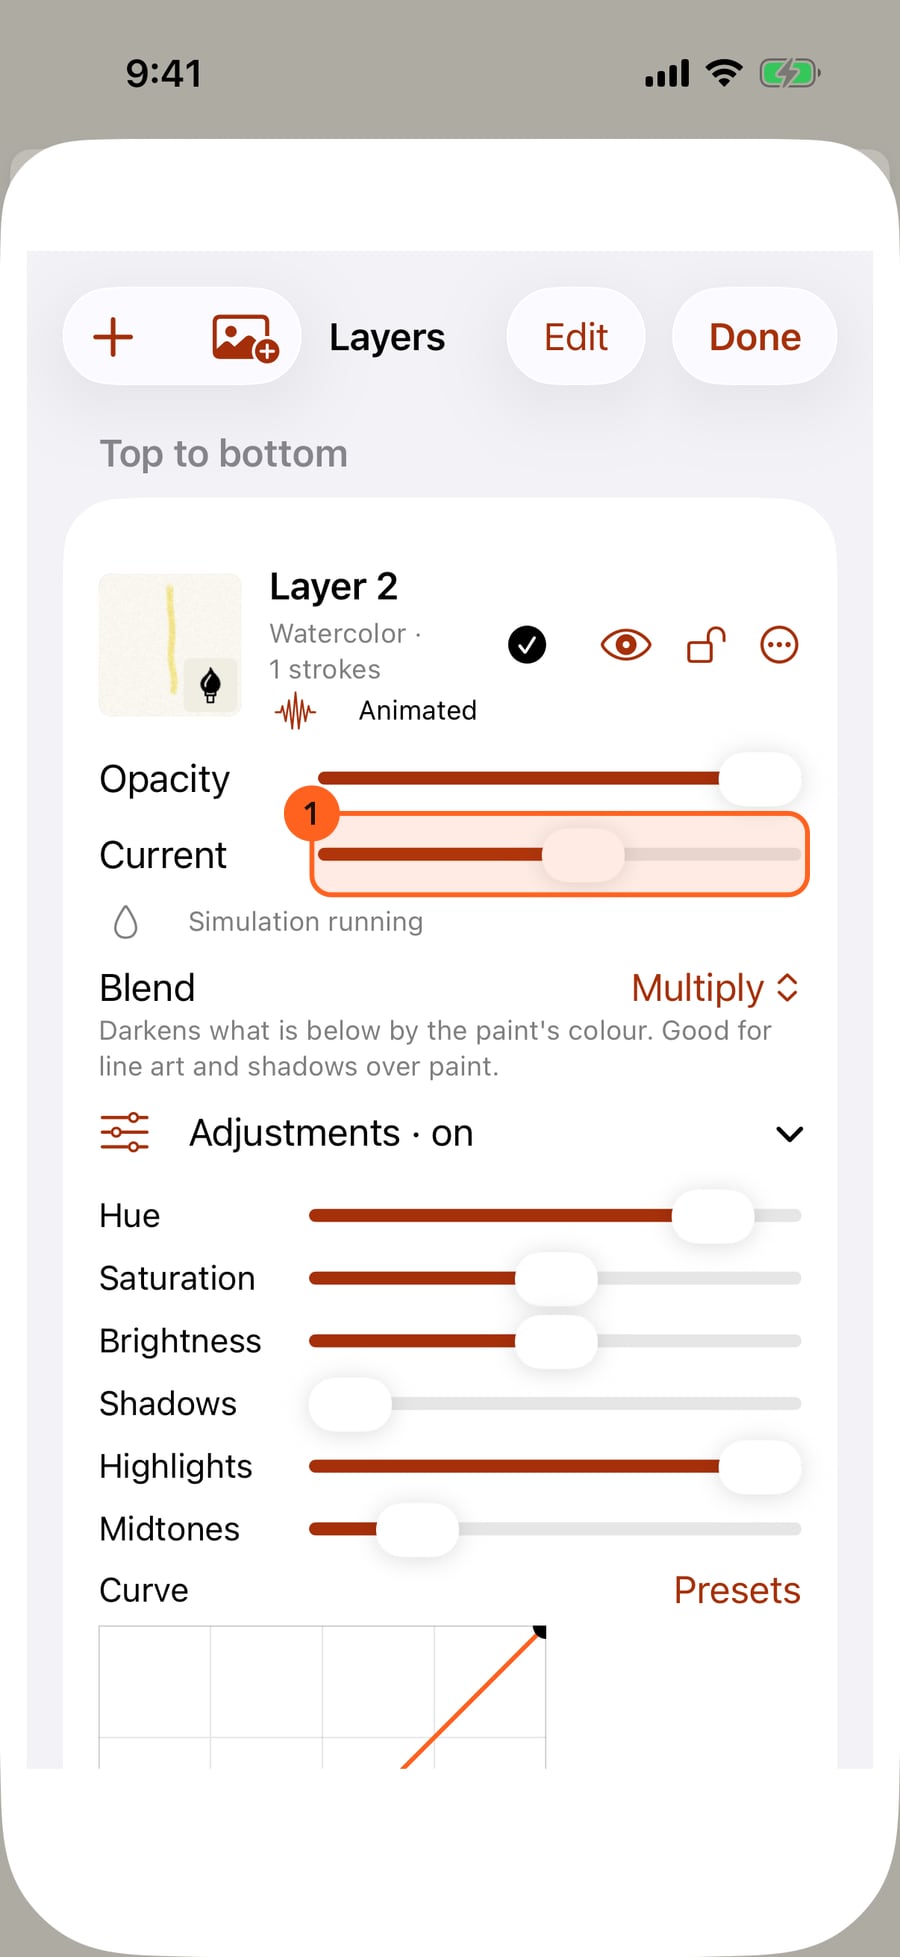
In the same list, wet layers have one more control. Current keeps the layer's wet paint drifting on its own, long after the strokes are painted.
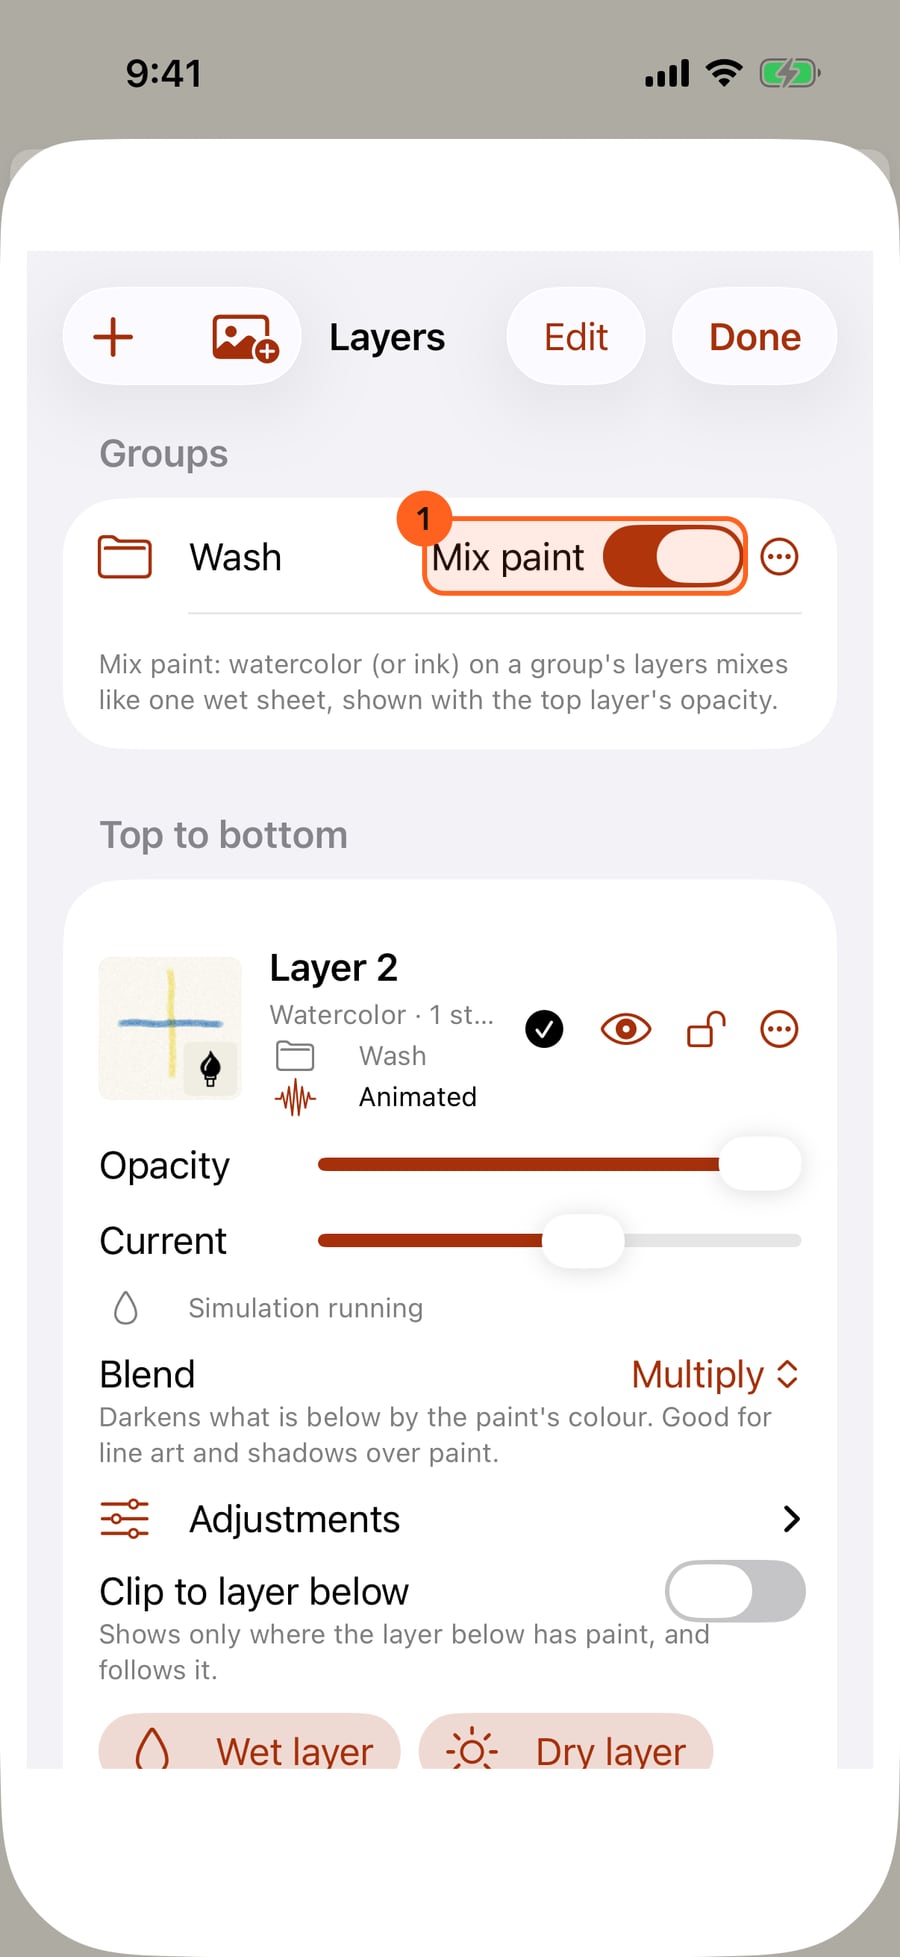
From each layer's menu choose Group, then New group, and name it Wash, so both share one group. Two watercolour layers in a group can Mix paint; turn it on.
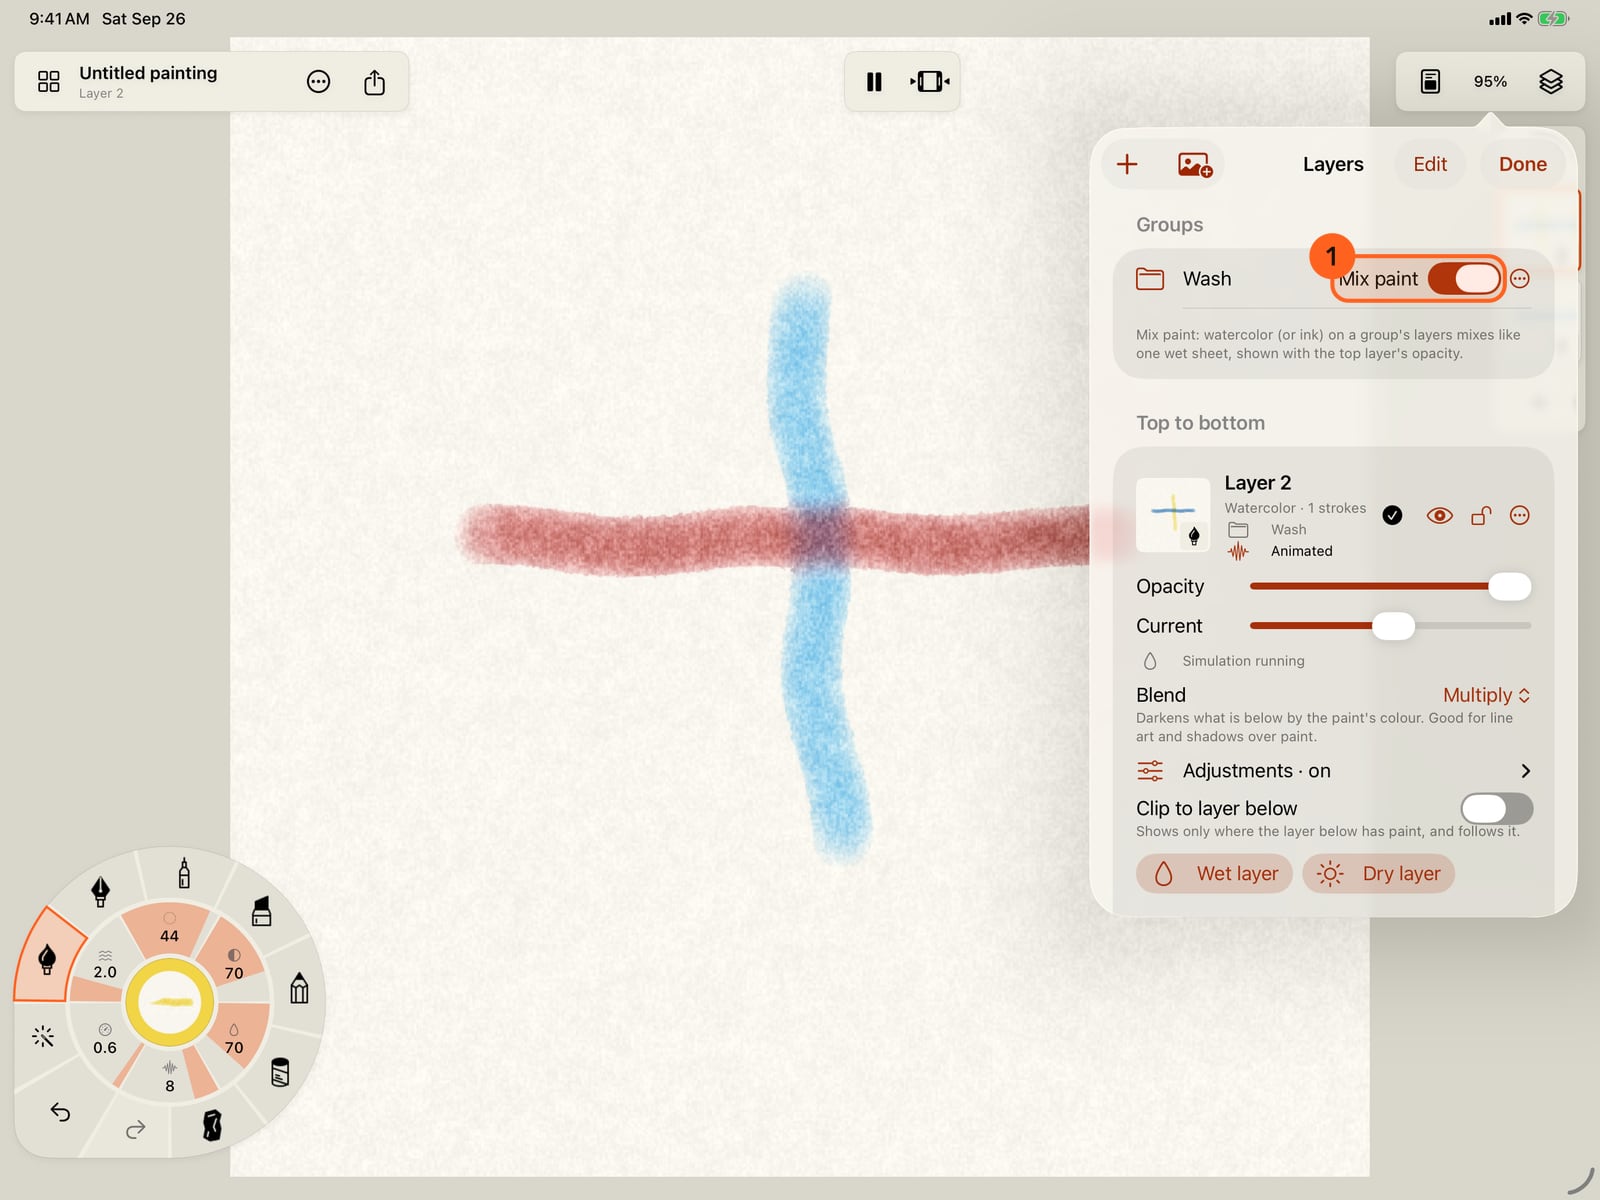
From each layer's menu choose Group, then New group, and name it Wash, so both share one group. Two watercolour layers in a group can Mix paint; turn it on.
Tap Done. The two layers now mix like one wet sheet, and the group shows with the top layer's opacity.
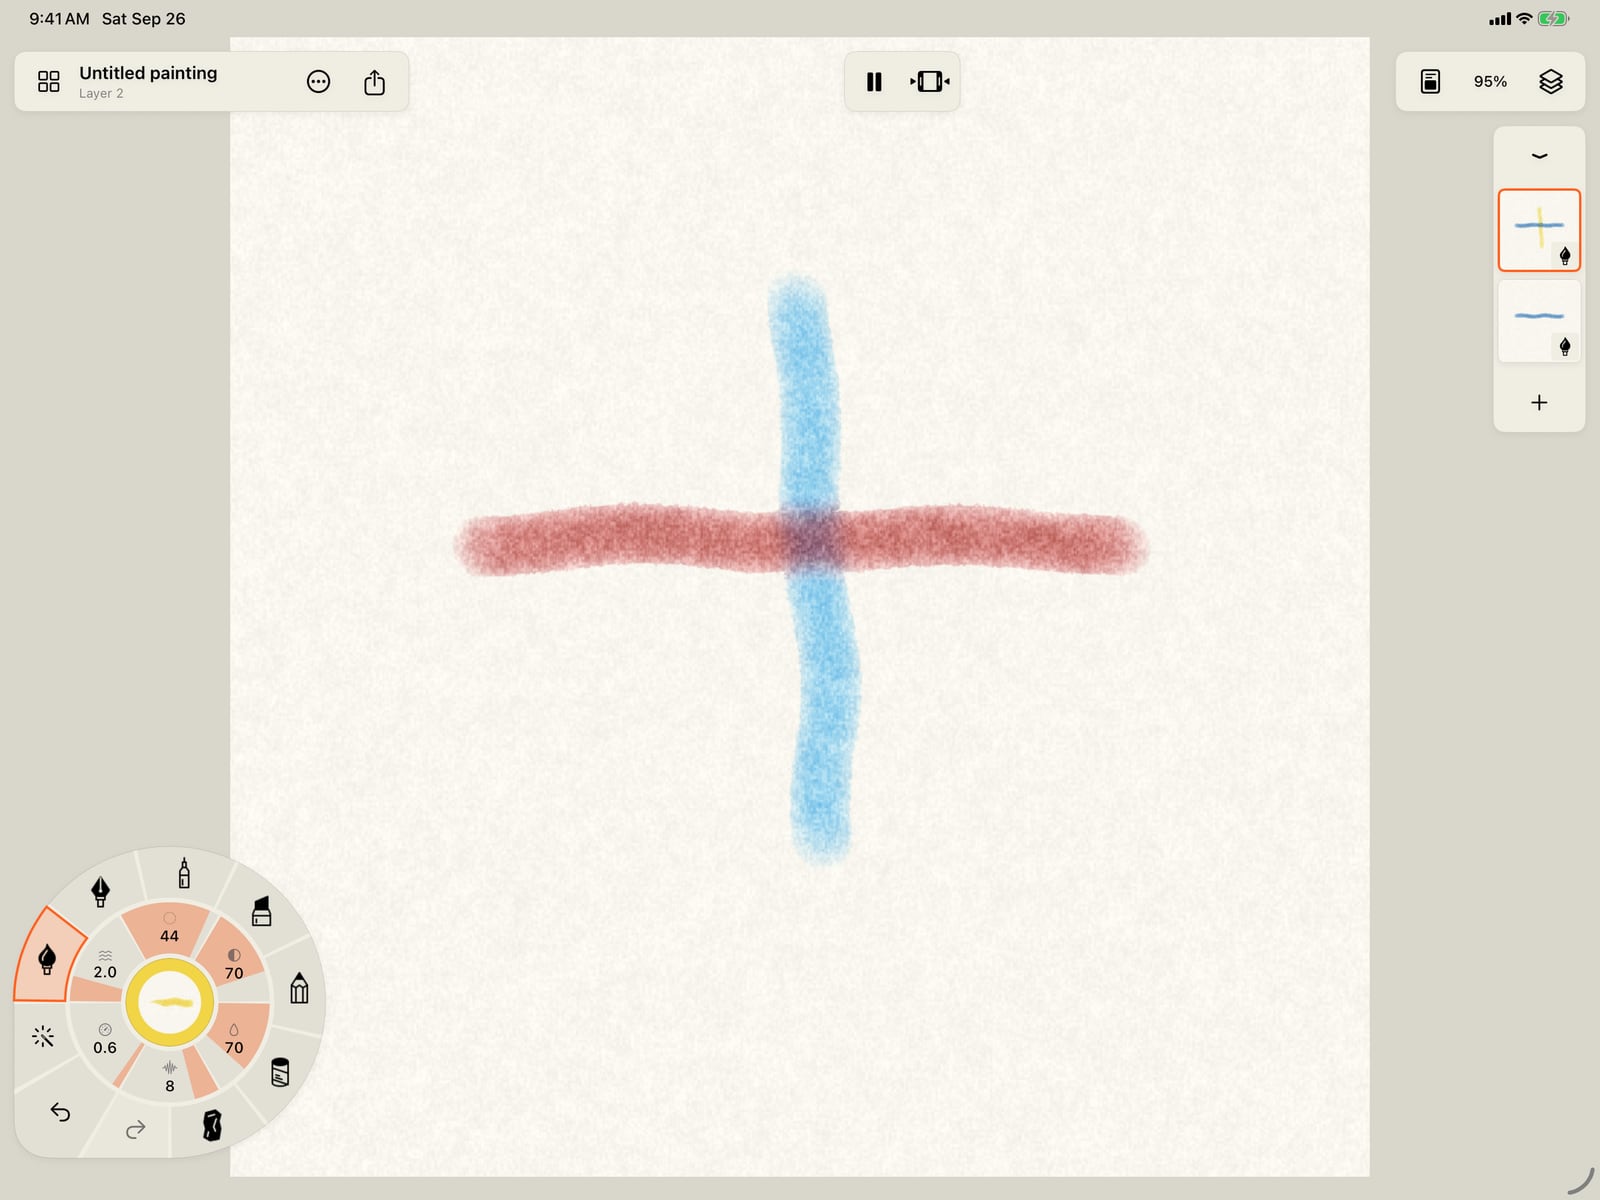
Tap Done. The two layers now mix like one wet sheet, and the group shows with the top layer's opacity.
Click Done. The two layers now mix like one wet sheet, and the group shows with the top layer's opacity.
A layer's controls
Tap the current layer's thumbnail in the strip, or open Layers and tap a layer, for its controls. They change how the layer looks over the ones below, never its paint: strokes keep moving and drying as painted, and one Undo takes back each change.
| Control | What it does |
|---|---|
| Opacity 1 | How much of the layer shows, from none to all. |
| Blend 2 | How the layer's colours meet what is below. See the table below. |
| Adjustments 3 | Colour and tone for the whole layer. Reads Adjustments · on while any is in use. |
| Clip to layer below 4 | Shows the layer only where the layer beneath has paint, and follows it as it moves. Not offered on the bottom layer. |
| Wet layer / Dry layer | Watercolour and ink layers: wet the whole page before painting wet-on-wet, or dry it before glazing. Each is one undoable step. |
| Current | Wet layers, in the Layers sheet: a steady current that keeps the layer's wet paint moving on its own. See below. |
Current
Watercolour and ink layers have a Current slider, under Opacity in the Layers sheet 1. At 0, the default, wet paint moves only as its strokes and the water spread it. Raise it and the whole layer's wet paint keeps drifting on its own while the painting plays, even after the strokes are finished; Simulation running or Simulation paused beneath it says whether that is happening now. Overall motion in Animation settings scales the current with everything else.
A layer with a current changes all the time rather than repeating, so the painting has no motion cycle to loop exactly: Animation settings says so under Common motion cycle.
Blend modes
| Mode | What it does |
|---|---|
| Normal | Paint covers what is below. |
| Glaze | Colours tint the layers below instead of covering them, like a transparent wash. Not for image layers. |
| Multiply | Darkens what is below by the paint's colour. Good for line art and shadows over paint. |
| Screen | Lightens what is below. Good for mist, highlights and light through paint. |
| Add | Adds light: brightest where colours meet. Good for glow. |
| Lighten | Keeps whichever is lighter, the paint or what is below. |
Marker layers have no Blend or Adjustments: marker already multiplies with what is below.
Adjustments
| Adjustment | Range |
|---|---|
| Hue | Turns every colour around the colour wheel, −180° to 180°. |
| Saturation | From grey (0) through as painted (1) to twice as vivid (2). |
| Brightness | Darker or lighter. |
| Shadows | Where black begins: raise it to deepen the darks. |
| Highlights | Where white begins: lower it to brighten the lights. |
| Midtones | Lightens or darkens the middle tones. |
| Curve | A tone curve: drag a point to move it, touch empty space to add one, drag an inner point off the square to remove it. Presets: Straight, Soft contrast, Strong contrast, Lift shadows, Deepen midtones, Fade. |
| Blur | Softens the whole layer. |
Reset adjustments clears them all.
Mix paint in groups
Group layers from the Layers sheet: a layer's ⋯ menu → Group → New group…, or the name of a group already there. When a group holds two or more watercolour layers (or two ink layers), its row offers Mix paint. With it on, their paint mixes like one wet sheet, shown with the top layer's opacity; the lower layers' opacity and blend step aside and say so. One Undo turns mixing off for the whole group.
On iPhone every control is in the Layers sheet, under the current layer. Scroll to reach them.
Pro: Opacity, blend modes, adjustments, clipping, groups and Mix paint are all Free.
Something not behaving as expected?
Visit support or write to [email protected].