The small guide
A few marks.
A place to begin.
Short, hands-on tutorials for Doodly Doodle on iPad.
Start with a simple stroke. See where it takes you.
Based on the app in development. Screenshots show the current preview.
01 / Your first painting
Start with water.
Or a little ink.
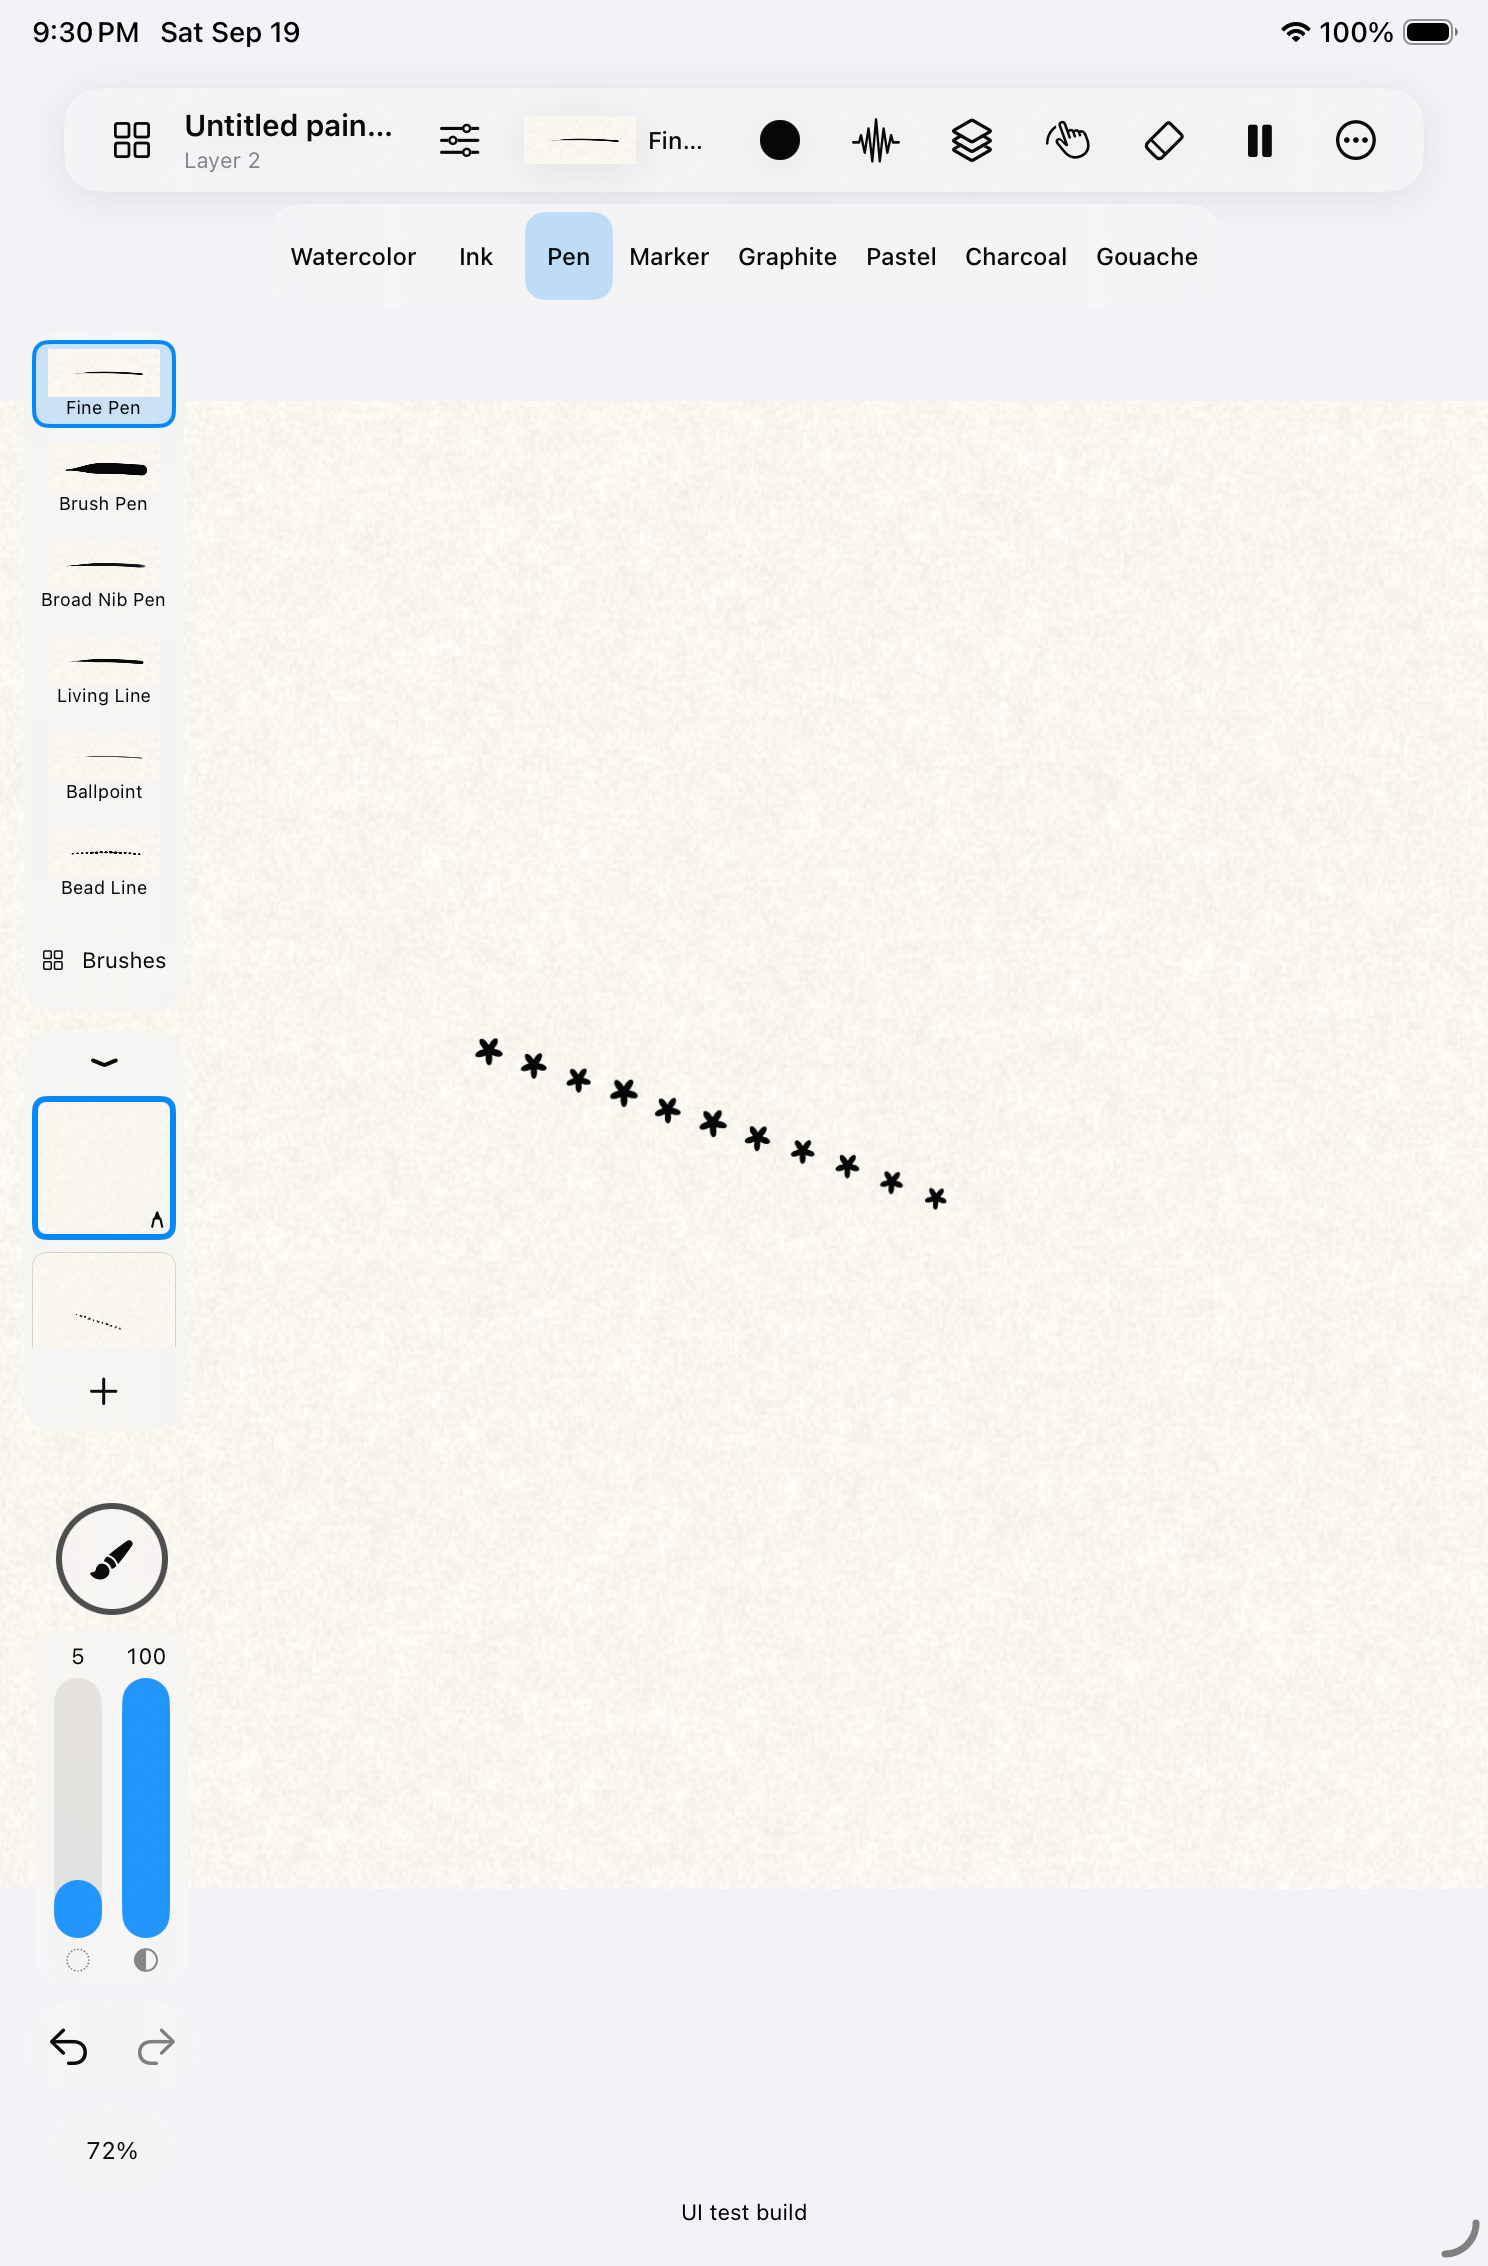
- Choose your brush. Tap Watercolor in the media row, then choose Round or Wet Round from the brush palette. For an ink line, choose Ink, then India Ink.
- Put a mark on the page. Draw with Apple Pencil, then lift. Adjust Size and Strength beside the canvas. With watercolor, try changing Water before your next stroke.
- Let the marks meet. Paint across a wet watercolor stroke and watch the overlap. Use the color button to choose another color, or keep working in black.
- Try a different paper. Open Canvas options (the three dots), then Paper. Compare the surface beneath your marks. Changes apply as you adjust them.
02 / A line, brought to life
Paint the movement.
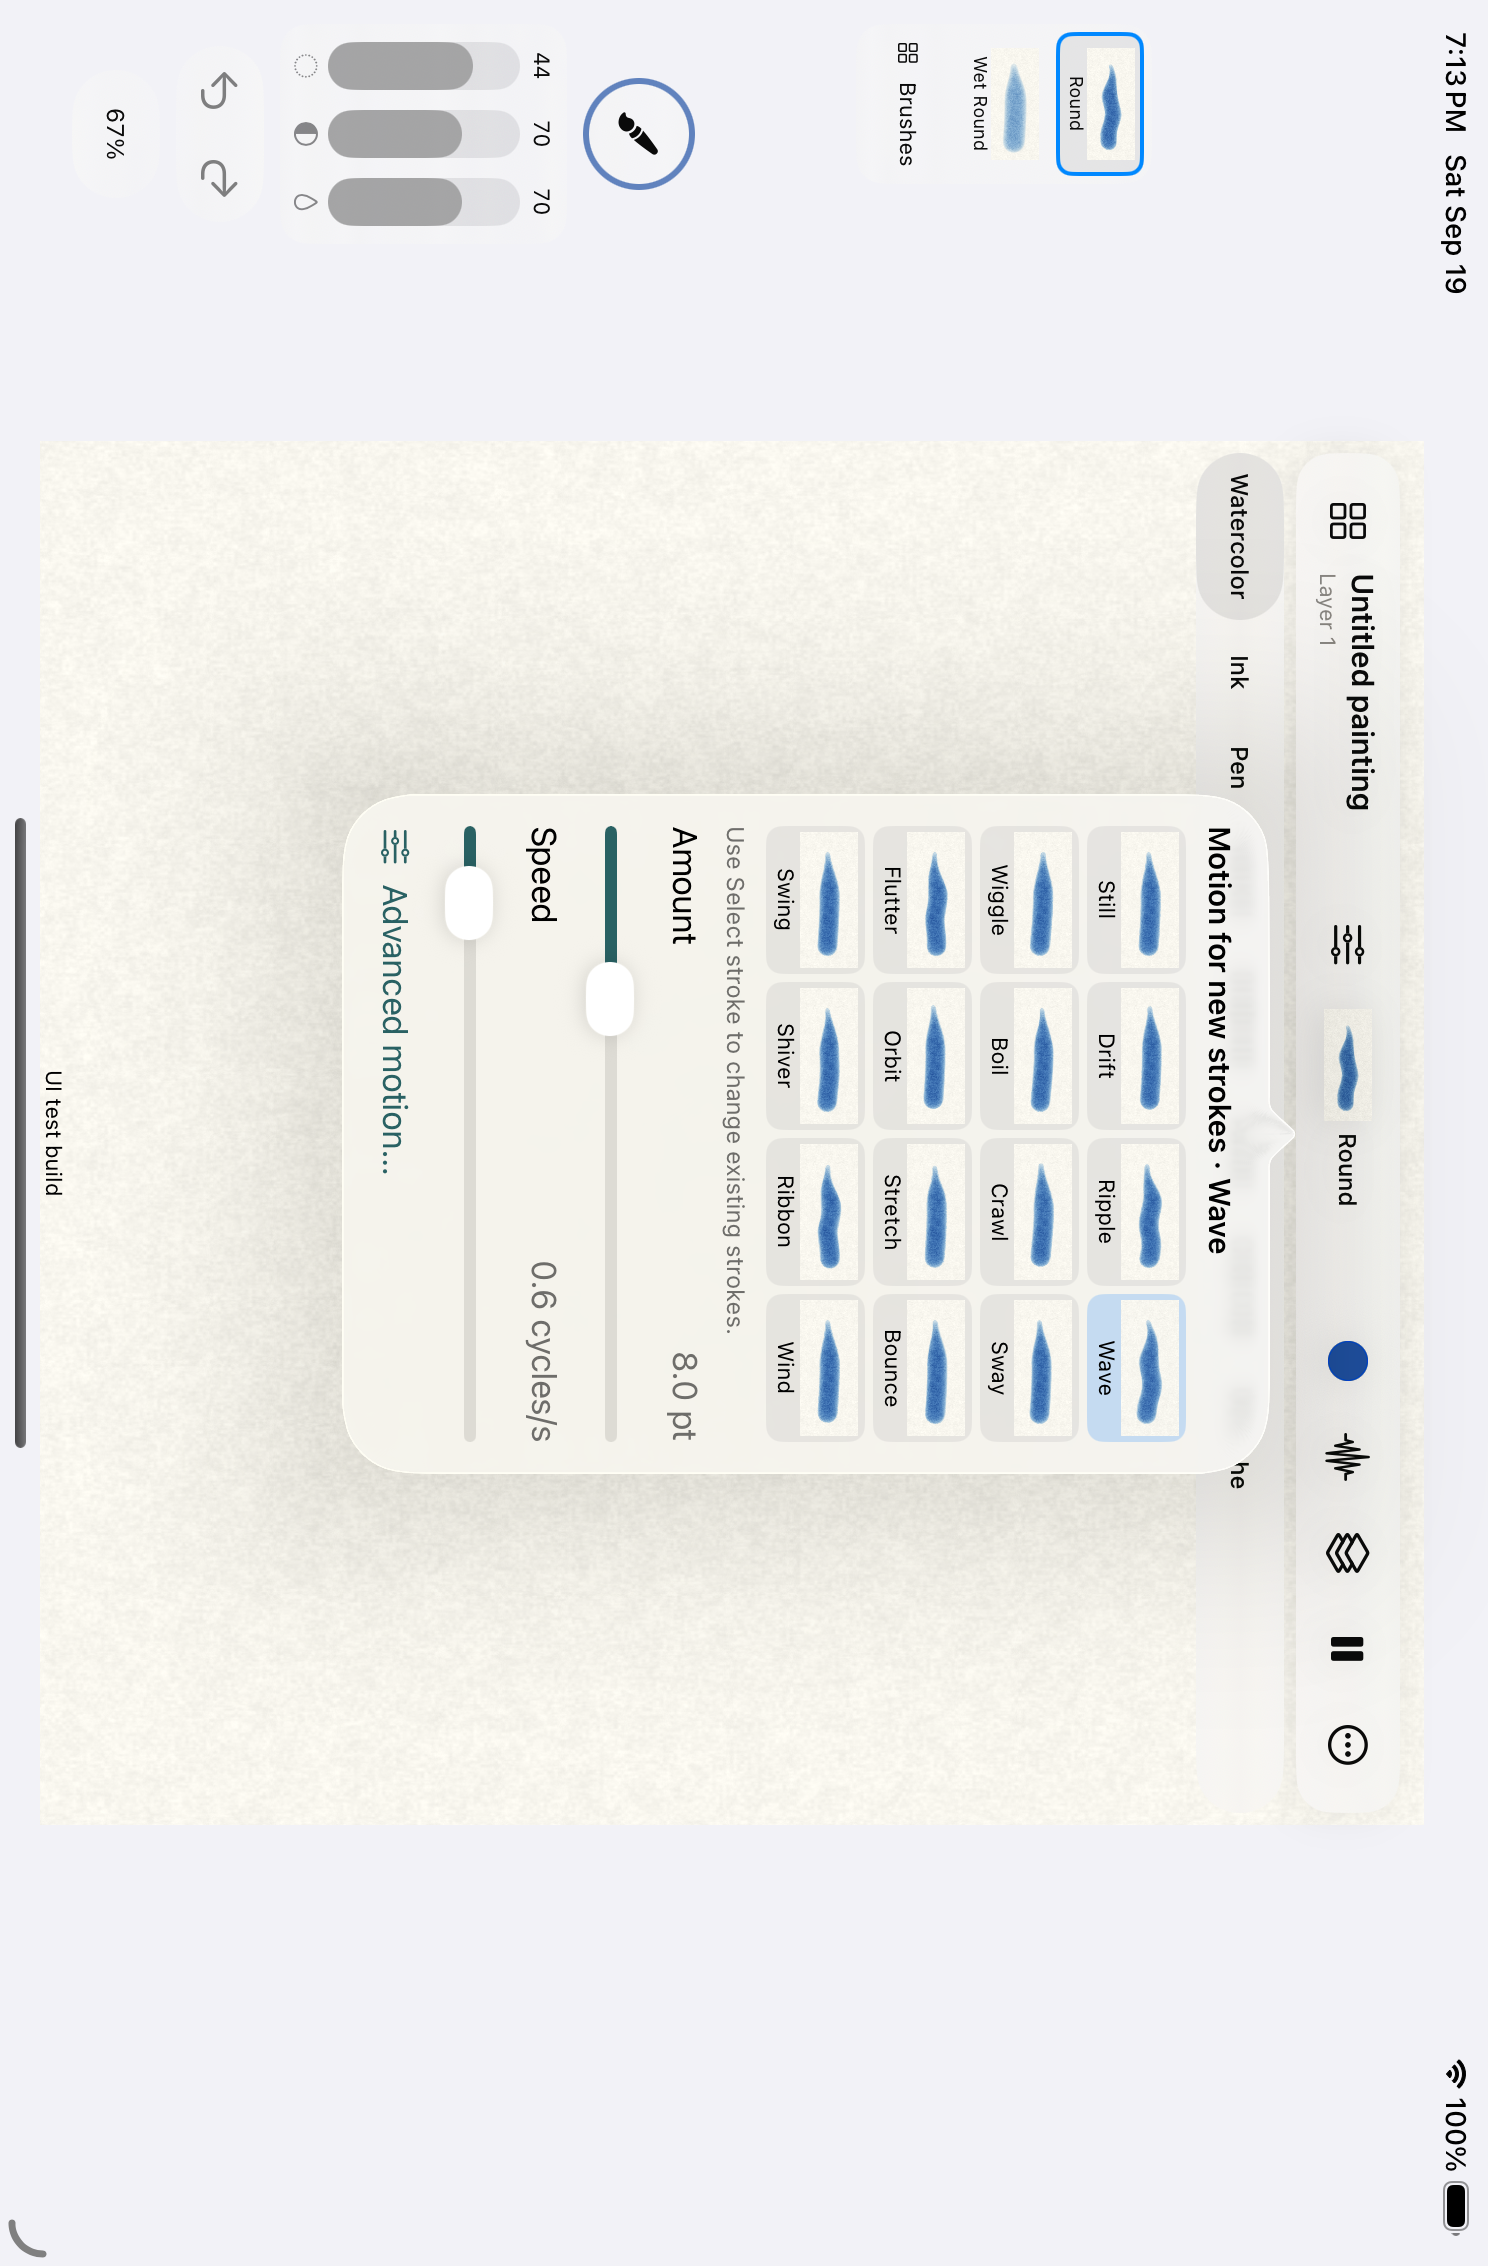
- Pick a motion before you draw. Tap the Motion button in the top toolbar. Choose Wave, Drift or Sway from the visual previews. The setting applies to new strokes.
- Draw, then lift. Make a long, loose line. If playback is paused, tap Play. Watch the mark move while the paper stays still.
- Find a quieter rhythm. Adjust Amount and Speed in the motion controls, then draw another stroke to compare. Choose Still for marks you want to leave at rest.
- Revisit an existing line. Open Canvas options → Select stroke, then tap the line. Change its motion in the stroke inspector. Return to drawing when you’re done.
03 / Fluid Marks
Follow a line
with drops of ink.
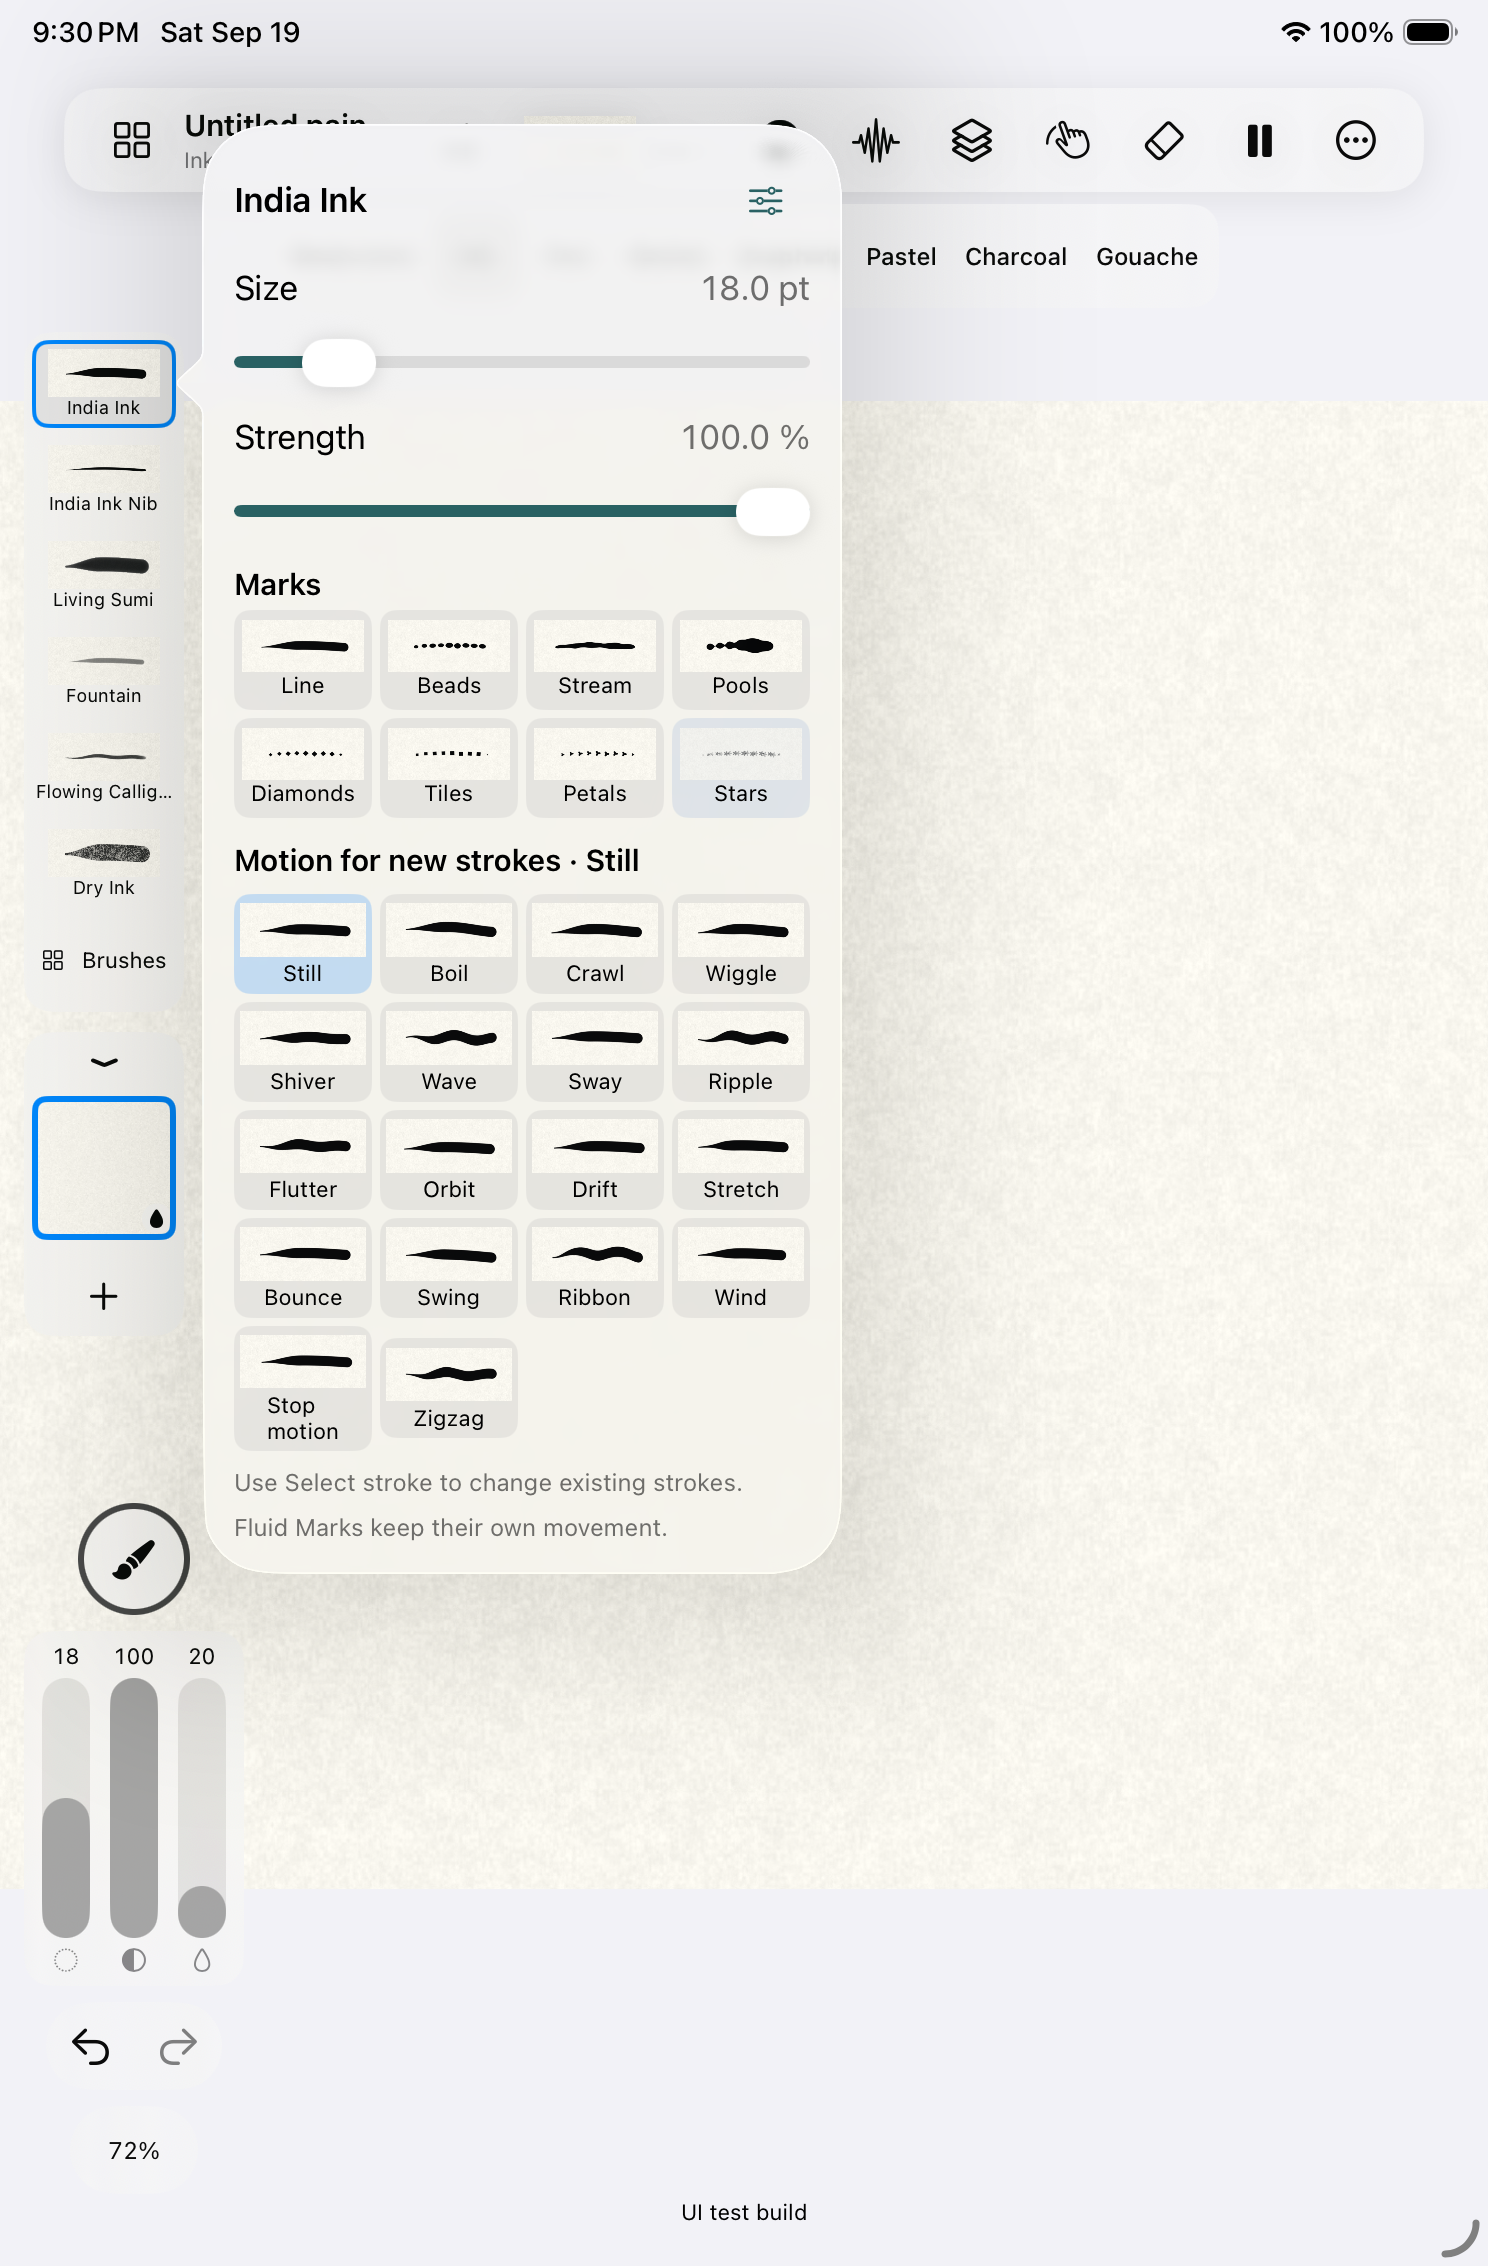
- Begin with Ink. Choose India Ink, then tap its active brush tile again to open its settings.
- Change the mark. Under Marks, choose Beads, Stream or Pools. Draw a curve and lift your Pencil: the marks appear once the stroke is complete.
- Bring two paths together. Draw a second path close to the first on the same layer. Fluid Marks can join as they meet. The layer’s Join Fluid Marks setting controls this.
- Adjust the flow. Use Canvas options → Select stroke to revisit a path and adjust its mark size, spacing and speed. Your original drawn line stays intact.
04 / Save & share
A still, a loop,
or the making of it.
- Keep a working copy. Your painting saves automatically. For a portable backup, open Project → Save project as… and choose a location in Files. An exported image isn’t an editable project.
- Choose your output. Open Project → Export image or animation…. Choose PNG, HEIF or TIFF for a still, a video or GIF for movement, or Time-lapse to show the painting taking shape.
- Set the size and timing. Free animation exports support a longest edge of up to 1080 pixels, up to 10 seconds, and up to 30 fps. Pro allows larger and longer exports.
- Check the loop, then share. When offered, use Match motion loop to fit the animation’s repeating cycle. Check any loop notice in the export sheet. Export, then choose Share exported files… to save or send the result.
Something not behaving as expected?
Visit support or write to [email protected].